
Epoxy cracks from poor mixing, extreme temps, moisture, or shifting concrete. Fix it by grinding the crack, applying a flexible filler, and recoating.
Imagine walking into your garage with your morning coffee, ready to admire your shiny, brand-new floor. Then you see it-a jagged little crack cutting right across the room. Talk about a total gut punch. If you are standing there right now asking yourself, why is my epoxy cracking?, take a deep breath. You are definitely not the first person to deal with this headache.
A tough epoxy floor coating looks amazing when it goes down, but it can be super unforgiving if something goes wrong during the project. Whether you are a DIY enthusiast trying to upgrade your workspace or a property manager fixing up a rental, a cracked floor feels like a waste of time and money. But don’t worry! By the end of this guide, you will know exactly what went wrong and how to fix it without losing your mind.
The Science of the Cure: Why Epoxy Breaks
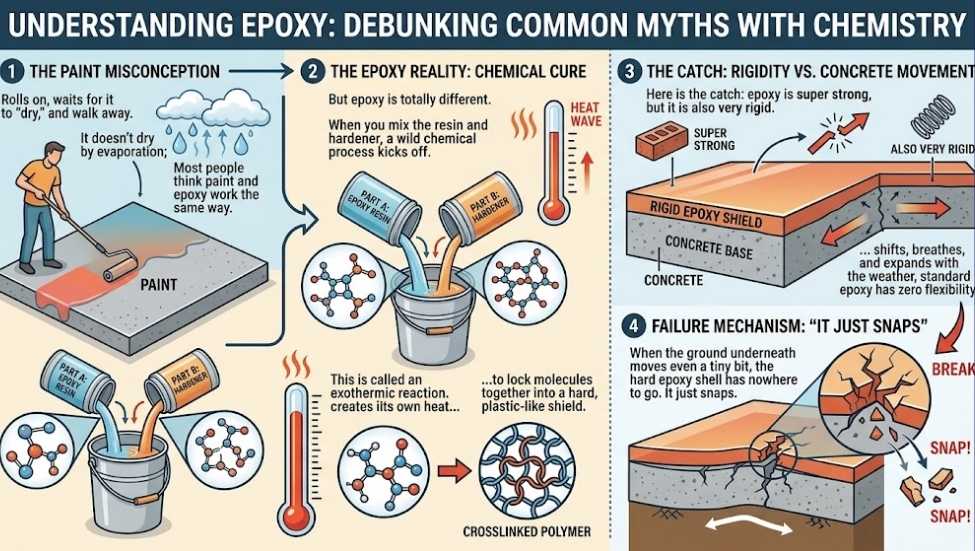
Most people think paint and epoxy work the same way. They figure you roll it on, wait for it to “dry,” and walk away. But epoxy is totally different. It doesn’t dry by evaporation; it hardens because of a chemical trick.
When you mix the resin and hardener, a wild chemical process kicks off. This is called an exothermic reaction. Basically, the mixture creates its own heat to lock molecules together into a hard, plastic-like shield.
Here is the catch: epoxy is super strong, but it is also very rigid. While concrete naturally shifts, breathes, and expands with the weather, standard epoxy has zero flexibility. When the ground underneath moves even a tiny bit, the hard epoxy shell has nowhere to go. It just snaps.
Decoding the Damage: Crazing vs. Structural Cracks
Not all floor cracks are built the same. Before you grab a patch kit, you need to play detective and figure out what kind of damage you are looking at. Fixing a tiny surface flaw is totally different from stopping a moving foundation crack.
| Type of Crack | What It Looks Like | Main Cause | How to Approach It |
| Crazing | A web of tiny, shallow spider cracks | Heat spikes, fast curing, or thin spots | Light sanding and a fresh topcoat |
| Plastic Shrinkage | Short, random thin lines during cure | Drying out too fast while hardening | Fill lightly and seal over |
| Structural Cracks | Deep, wide, jagged lines in the floor | Concrete substrate or foundation movement | Chasing the crack, filling deep, and using flexible filler |
Spotting Surface Crazing
If your floor looks like a shattered smartphone screen under your feet, you are looking at crazing. These are hairline fractures that only live on the very top layer of the coating. They usually happen when the room gets way too hot while the resin is curing, causing the top to skin over way faster than the bottom. It looks ugly, but your actual floor strength might still be safe.
Dealing with Structural Shifting
On the flip side, if the crack is deep and follows a crack already sitting in the concrete underneath, you are dealing with structural shifting. This means the earth or the slab itself moved after you coated it. No amount of topcoat will save this until you deal with the actual gap in the concrete base.
The Core Causes: Why Is My Epoxy Cracking?
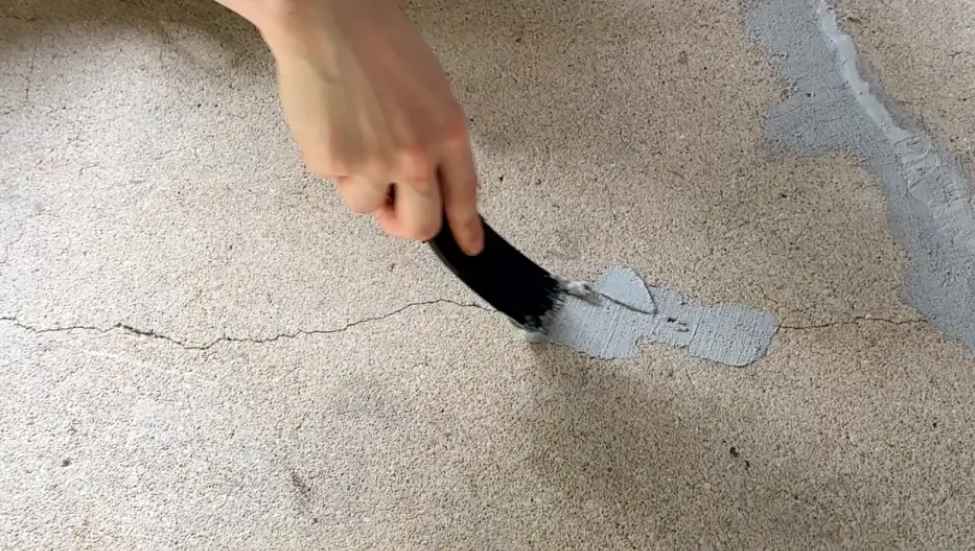
So, you figured out what kind of crack you have. Now we need to figure out what caused it in the first place. If you are scratching your head asking, why is my epoxy cracking?, start by looking at these five common traps. Honestly, even the pros mess these up sometimes!
1. Improper Epoxy Mixing Ratios
Ever tried baking a cake without measuring the flour? It usually ends in a disaster. The same rule applies here. Mixing your resin and hardener is the most critical step of the whole project.
Every single brand has a specific mixing ratio. Some want a 1:1 mix, while others need 2:1 or even 3:1. If you eyeball it or try to guess, the chemical bond fails. Unmixed resin leaves soft, sticky spots. Too much hardener makes the floor super brittle. When you walk or drive on a brittle floor, it cracks almost instantly. Always measure exactly, and do not forget to scrape the sides of your bucket while you mix!
2. Pouring Epoxy Too Thick (Thermal Runaway)
More is always better, right? Well, not with floor coatings! Remember that exothermic reaction we talked about in the first section? When you mix the chemicals, they create heat.
If you pour the liquid too thick, the heat gets trapped. This leads to a massive temperature spike called thermal runaway. The coating gets extremely hot, cures way too fast, and actually shrinks. As it shrinks, it pulls apart and creates deep cracks. Always stick to the manufacturer’s recommended thickness. Garage floor coatings are meant to be thin. If you want a thick, clear layer, you need a special casting resin, not floor epoxy.
3. Concrete Substrate Movement & Settling
Here is a hard truth: houses settle. Dirt shifts. Concrete moves. If the concrete substrate under your coating cracks, your pretty new floor is going to crack right along with it.
Many DIYers make the mistake of filling their concrete control joints (those straight lines cut into your driveway or garage) with rigid epoxy. Those joints are cut into the concrete on purpose! They give the slab room to expand and shrink. If you lock those joints together with a hard coating, the pressure builds up until the floor violently snaps.
4. Moisture Vapor Transmission (MVT) Failure
Think your concrete floor is completely bone dry? Think again. Water lives under the ground, and it constantly tries to escape upward. This is called moisture vapor transmission (MVT).
When water vapor pushes up through the concrete, it hits your waterproof epoxy barrier. It has nowhere to go. So, it builds up hydrostatic pressure. Eventually, this water pressure becomes so strong it physically blows the coating right off the concrete. You will see bubbles, blisters, and eventually, sharp cracks. I always tell people to tape a square of clear plastic to their floor for 24 hours before starting. If moisture collects under the plastic, you have a water problem you need to fix first.
5. Thermal Shock & Extreme Epoxy Curing Temperatures
Imagine throwing an ice-cold glass into a sink full of boiling water. The glass shatters, right? Your floor does the exact same thing. We call this thermal shock.
This usually happens in cold climates. Your garage floor is freezing all day. Then, you pull your car inside after a long drive. Your tires are blazing hot. That sudden blast of heat directly on freezing, rigid epoxy causes hot tire pickup. The coating expands too fast and cracks right under your tires.
The temperature of the room while you apply the coating matters a lot, too. Check out how different epoxy curing temperatures ruin a good floor:
| Garage Temperature | What Happens to the Epoxy | The Final Result |
| Below 50°F (10°C) | Cures way too slow. Stays thick and gooey. | Never fully hardens; cloudy finish. |
| 60°F to 75°F (15°C to 24°C) | The Sweet Spot! Cures perfectly. | Strong, smooth, and crack-free. |
| Above 85°F (29°C) | Flash cures. Hardens in the bucket. | Brittle, shrinks, and causes crazing cracks. |
Always check the weather before you start your project. A mild, dry day is your best friend when painting a garage floor!
Related Article: Can You Use Epoxy Floor Paint on Wood?
How to Fix Cracked Epoxy Like a Pro
Think you can just slap some extra paint over a crack and call it a day? I wish it were that easy! If you just paint over a crack, it will show up again in a few weeks. To fix it right, you have to do a little dirty work.
Here is how you actually fix those ugly lines for good.
Step 1: Chase the Crack
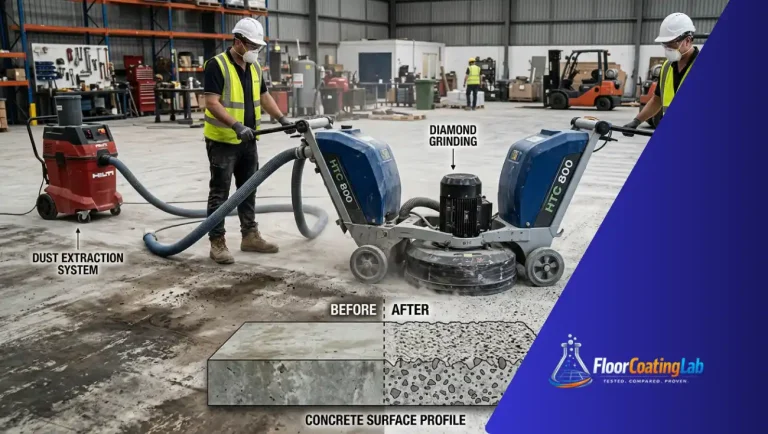
First, you have to open the crack up. We call this “crack chasing.” Grab an angle grinder with a diamond grinding wheel and gently run it along the crack. You want to make the crack into a “V” shape. This gives your filler something to grab onto. Be sure to vacuum out all the dust afterward! If you leave dust in the hole, the patch will fail.
Step 2: Choose the Right Filler
Don’t use cheap concrete patch from the local hardware store. Honestly, I always tell people to spend a few extra bucks here. You want a high-quality epoxy crack repair kit or a polyurea joint filler. These products are made specifically to bond with your floor. Mix it up, overfill the crack just a tiny bit, and use a putty knife to smooth it out.
Step 3: Sand and Recoat
Once your patch is totally dry and rock-hard, sand it completely flat. It needs to be perfectly smooth with the rest of the floor. Finally, apply a fresh topcoat over the patched area to blend it in.
Bulletproof Prevention: How to Avoid Cracks on Your Next Pour
Fixing cracks is annoying. Preventing them is so much easier! If you are getting ready to do a new floor, keep these simple tips in mind.
- Respect the Control Joints: See those straight lines cut into your garage floor? Leave them alone! Do not fill them with hard epoxy. If you really want a seamless floor, fill those joints with a flexible polyurea sealant instead.
- Test for Moisture: Always do a calcium chloride moisture test before you start. It is super cheap and saves you from a massive headache later.
- Use Flexible Additives: If your concrete moves a lot, look into flexible epoxy additives. These give the coating a little bit of stretch.
In fact, if you live somewhere with extreme weather, you might want to skip standard epoxy completely. Check out this quick comparison:
| Coating Type | Flexibility | Best For |
| Standard Epoxy | Very Low (Rigid) | Basements, mild climates, steady temperatures |
| Flexible Epoxy | Medium | Old garages, areas with slight concrete shifting |
| Polyaspartic | High (Very flexible) | Extreme hot/cold weather, heavy car traffic |
According to flooring industry data, concrete naturally shrinks about 1/8 inch for every 100 feet as it dries. That sounds tiny, but it is plenty of movement to snap a rigid floor! This is why flexibility matters so much.
Frequently Asked Questions (FAQ)
Can you pour fresh epoxy over cracked epoxy?
No way! If you pour fresh coating over a cracked floor without fixing the crack first, the new layer will simply break in the exact same spot. We call this “reflective cracking.” You must fill the gap first.
Will a clear coat hide epoxy cracks?
Absolutely not. A clear topcoat acts like a magnifying glass. It will actually make the cracks look darker and more obvious.
How long does it take for epoxy to crack if mixed wrong?
It depends! Sometimes, if the mix is way off, it cracks within a few hours due to heat. Other times, it might look fine for a month before it slowly starts peeling and snapping.
Final Words
So, next time a buddy points at his garage floor and asks you, “why is my epoxy cracking?”, you will know exactly what to tell them! It almost always comes down to bad mixing, weird temperatures, or the ground moving underneath.
Look, nobody wants to deal with a broken floor. It is super frustrating. But now you have the tools to figure out what went wrong and how to fix it like a true professional.
If you are feeling overwhelmed, or if you just want to make sure you buy the right products the first time, you don’t have to do it alone. Reach out to the experts at Floor Coating Lab. From heavy-duty patch kits to flexible topcoats, we have everything you need to build a tough, beautiful floor that actually lasts.

3 Comments
Comments are closed.