
Prep concrete to a rough 60-grit feel. Roll a 100% solids epoxy base, walk in spike shoes, and rain down colored quartz sand until dry. Vacuum excess and seal with a clear coat.
Ever walked into a high-end commercial kitchen, a sleek car showroom, or a luxury garage and wondered how their floors look so amazing? They have this beautiful, speckled texture that looks like shimmering granite, but it feels tough as nails. Well, that is not regular paint. It is a quartz epoxy flooring system.
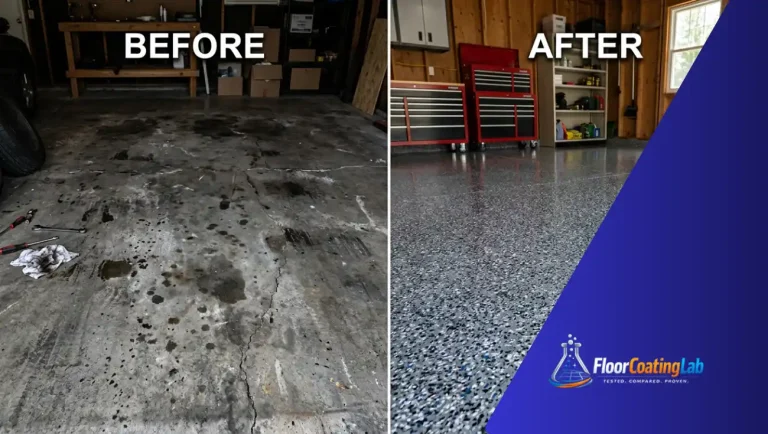
If you are tired of looking at ugly, stained, dusty concrete in your workspace or garage, you are in the right place! Learning how to apply epoxy colored sand floor paint might seem like a project meant only for giant industrial crews. But guess what? You can absolutely do this yourself if you know the hidden rules of the trade.
Let’s be totally honest here. Spreading the actual paint is the easy, fun part. The real secret to a floor that never peels lies deep inside the science of the concrete itself. If you skip the hidden steps, your beautiful new floor will literally slide right off the slab in a year or two.
Who wants that? Nobody! Let’s break down the ultimate guide to prepping your sub-floor like a true coating scientist.
Substrate Engineering & The Physics of Adhesion
The True Chemistry of a Quartz Epoxy Flooring System
Before we grab our tools, we need to understand what this material actually is. Many homeowners go to the local hardware store and buy cheap, watery DIY floor paints. Those are usually just basic water-based paints with a tiny bit of resin mixed in. They wear out fast!
A true epoxy colored sand floor paint is a completely different animal. It uses a 100% solids epoxy receiver coat. This means there are no water or solvents inside that will evaporate into the air as it dries. What you roll onto the floor is exactly what stays on the floor!
When you mix the two parts together, a chemical reaction occurs that makes the liquid get warm and turn into a solid, heavy-duty plastic. While that base layer is still wet, you throw down special ceramic-coated quartz granules. This creates a thick, multi-layered shield over your concrete. It is completely seamless, highly impact-resistant, and won’t get ruined by oil spills or dropped heavy tools.
The Hidden Law of Adhesion: Why Preparation is Everything
Here is my personal, unapologetic opinion: concrete preparation is 80% of the entire job. If a company tells you that you can just sweep your garage and start painting, they are trying to sell you a lie!
Epoxy does not stick to concrete like tape sticks to paper. It needs to dive deep into the microscopic pores of the stone to lock itself in place. This is called a mechanical bond. If your concrete is smooth, shiny, or covered in old grease, the epoxy cannot grab hold. It will fail. According to concrete coating failure data, over 90% of resinous floor issues happen because the surface wasn’t prepped right.
Let’s look at the critical testing steps you must take before mixing any chemicals.
The 28-Day Curing Rule for Fresh Concrete
Did you just pour a beautiful new concrete slab for your garage or patio? That is awesome! But you cannot paint it yet. Fresh concrete looks dry on top after a few days, but it is actually holding onto a massive amount of hidden water inside.
You must wait a minimum of 28 to 30 days for new concrete to fully cure and release its internal moisture. If you paint too early, that trapped water will turn into vapor, push upward, and pop your expensive new coating right off the ground.
Testing for the Invisible Enemy: Moisture Vapor
Water is constantly moving through the earth, and it can travel right up through your solid concrete floor like a giant sponge. This movement is called concrete moisture vapor testing conditions. If you trap this rising vapor under a heavy epoxy shield, it creates immense hydrostatic pressure.
To test for this, you should use an ASTM F1869 calcium chloride test kit or a digital relative humidity meter.
- The Rule: Your concrete’s internal moisture level must be below 8% before you apply the base coat.
- The Fix: If your floor fails this test and shows high moisture, do not panic! You just need to apply a specialized moisture vapor barrier primer before rolling out your colored sand base coat.
The Easy Water Droplet Test
Want a super fast, free trick to see if your concrete is ready for paint? Splash a few drops of clean water onto different spots of your floor.
Watch what happens next closely:
- If the water sinks into the concrete within a minute and leaves a dark wet spot, your floor is porous and ready to be prepped.
- If the water beads up on top like a freshly waxed car, you have a major problem! It means your floor has an old sealer, curing compound, or concrete densifier on it. Epoxy will completely reject this surface, so you must grind that layer away.
Mechanical Surface Profiling: Getting the Right Bite
Forget about using liquid acid kits from the home improvement store. Acid etching is messy, dangerous, and highly unpredictable. If your concrete is cold or the acid sits too long, it can ruin the slab or leave it too smooth.
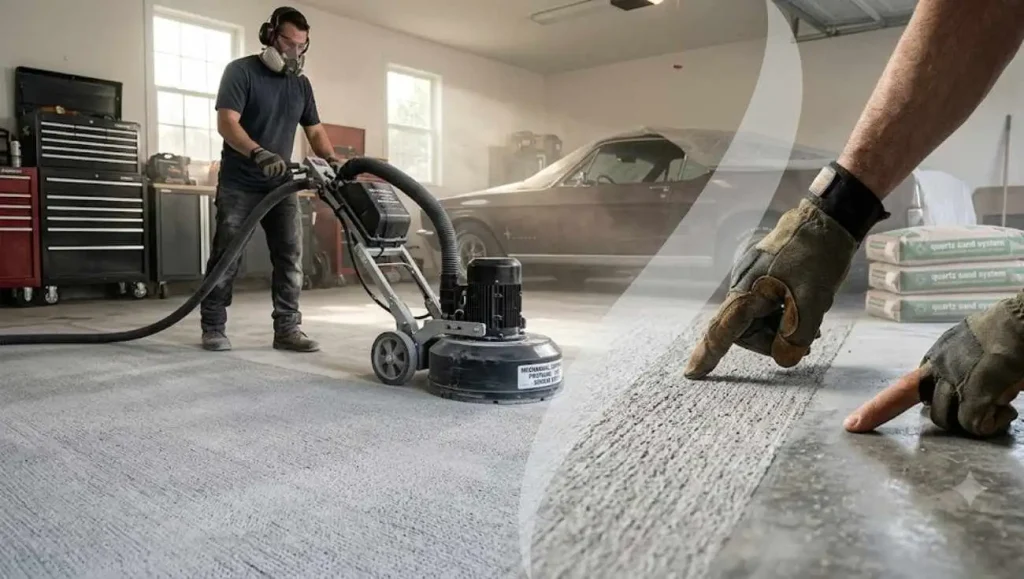
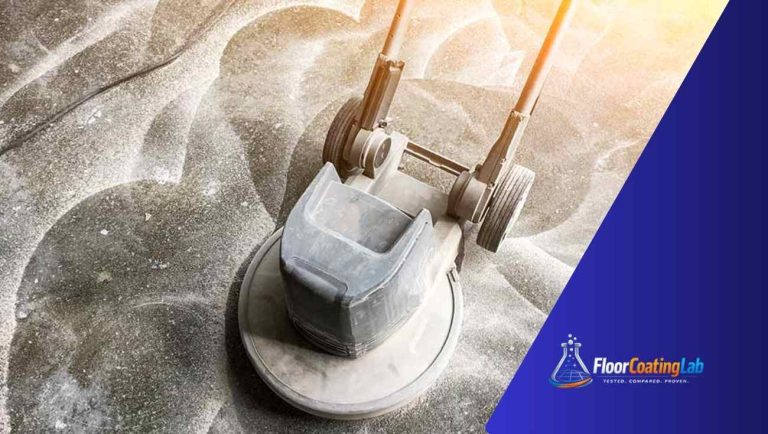
To get a flawless bond for a quartz sand system, you need to use a mechanical diamond floor grinder or a shot-blaster. You can easily rent these walk-behind grinding machines at local tool rental yards.
Your goal is to achieve an official concrete surface profile (CSP-2). This is an international standard that measures how rough a floor feels. A CSP-2 profile means the concrete should feel exactly like 60-grit sandpaper. When you run your hand across it, it should feel distinctly scratchy. This rough texture gives your heavy epoxy base coat millions of tiny anchor points to grab onto forever.
Chase, Patch, and Clean: The Final Details
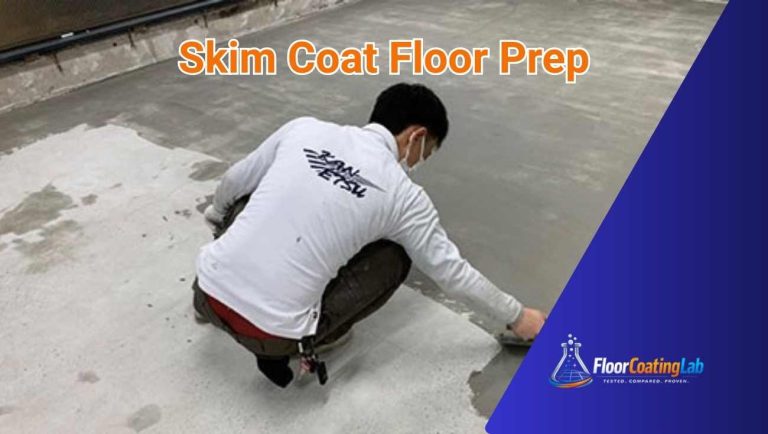
Once your floor is fully ground down, you will probably see a few hidden cracks and pits that were buried under the old dirt. You cannot just paint over these! The thin epoxy will sink into the cracks, making them stand out like a sore thumb on your finished floor.
How to Execute Professional Crack Repair
- Crack Chasing: Take a small angle grinder equipped with a V-shaped crack-chasing diamond blade. Run the blade down the length of every hairline fracture to widen it slightly. This sounds counterproductive, but it creates a clean, deep channel for your patch material to fill.
- The Patching Material: Mix up a rigid, 100% solids epoxy joint filler or create a homemade slurry by mixing epoxy resin with clean silica sand.
- The Absolute Warning: Never use standard silicone caulks, latex spackle, or wood filler to fix your concrete! Epoxy hates these materials. It will immediately bubble up and release its grip over them.
- Scraping Smooth: Overfill the cracks slightly, let the patch dry completely, and then use a hand scraper or a small grinder to sand it perfectly flat with the surrounding floor.
Industrial De-dusting
After grinding and patching, your garage will be covered in fine, white concrete dust. This dust is another hidden enemy. If you leave it behind, your epoxy will stick to the loose dust particles instead of the solid concrete slab!
Sweeping with a broom is not good enough because it just kicks the dust back into the air. You must use an industrial shop vacuum equipped with a high-efficiency particulate air (HEPA) filter. Slow, steady vacuuming is required to extract every single micro-particle from the freshly cut pores of your stone.
Let’s look at a clear data summary of the ideal environmental and substrate conditions required before you mix your first batch of floor resin:
| Substrate Parameter | Ideal Target Metric | Why It Matters |
| Concrete Age | 28+ Days minimum | Prevents internal water from trapping |
| Moisture Content | Less than 8% (or <3 lbs/1000 sq ft) | Stops hydrostatic pressure and bubbles |
| Surface Texture | CSP-2 (60-Grit Sandpaper feel) | Provides deep mechanical anchoring |
| Ambient Temperature | 50°F to 90°F (10°C to 32°C) | Fosters correct chemical curing speed |
| Relative Humidity | Below 65% | Prevents moisture blushing on the wet resin |
Mixing, Priming, and the Double Broadcast System
Now that your concrete slab looks clean and feels as scratchy as a sheet of 60-grit sandpaper, you have successfully beaten the hardest part of the project. Give yourself a quick pat on the back! But don’t get too comfortable just yet. Now we are stepping into the actual chemical phase of learning how to build our physical flooring layout.
This is where the clock starts ticking. Once you mix part A and part B together, a chemical reaction kicks off, and you enter a race against the clock. Let’s look at how to prime your floor, walk on water (or rather, wet resin) using spike shoes, and throw your colored sand aggregates down like a seasoned concrete pro.
Mastering the Chemistry: Mixing and Liquid Pot-Life
When you open your material kit, you will see two liquids: Resin (Part A) and Hardener (Part B). Separately, they are completely harmless liquids that can sit on a shelf for years. But the second they hit the same bucket, a thermo-setting reaction begins. The mixture will actually start creating its own physical heat!
The Pot-Life Trap
Here is a major warning that catches almost every first-time DIYer off guard: pot-life. Pot-life is the exact amount of time you have to work with the liquid epoxy before it turns into a rock inside your bucket.
For a high-quality 100% solids epoxy, your pot-life is usually only 20 to 30 minutes at room temperature. If you leave the mixed epoxy sitting in a deep five-gallon bucket, the heat builds up even faster. It can literally start smoking and turn into a solid chunk of plastic in 15 minutes!
- My Personal Trick: The second you finish mixing your batch with a drill mixer for three full minutes, pour it all out onto the floor in a long, snake-like line. Spreading the liquid across the cool concrete immediately slows down the heat reaction, giving you much more time to roll it out smoothly.
Step 1: Applying the Penetrating Primer Coat
Do you really need a primer coat? Yes, you absolutely do! Think of your freshly ground concrete like a giant, dried-out brick. If you pour your thick colored sand base layer directly onto raw concrete, the stone will suck up the liquids like a sponge.
This causes ugly bald spots and forces tiny air bubbles to shoot up to the surface, creating permanent craters.
To stop this, we apply a clear, low-viscosity (very thin) epoxy primer first. This thin liquid dives deep into the microscopic concrete pores and seals them shut completely.
How to Roll It Out
- Mix a small batch of your primer coat.
- Pour it on the ground and use a flat rubber squeegee to pull the liquid tightly across the floor.
- Follow right behind with a 3/8-inch nap lint-free paint roller to back-roll the primer. This ensures an even, smooth film with no deep puddles.
- Let the primer cure until it is tacky or dry to the touch (usually 8 to 12 hours) before moving to the next stage.
Step 2: The Base Receiver Coat and the Spike Shoe Dance
Now comes the fun part. The base receiver coat is the wet glue layer that will permanently hold your beautiful colored sand granules in place. This layer is usually a colored epoxy that matches the dominant color of your decorative sand blend.
To do this right, you need to buy a pair of specialized spike shoes. These are heavy plastic sandals with 1-inch steel spikes sticking out of the bottom. You strap them right onto your regular work boots. They allow you to walk directly through the wet, gooey epoxy without leaving big footprints or pushing the liquid out of the way!
Spreading the Liquid
For the base coat, throw away your standard paint trays. You want to use a notched squeegee (a squeegee with tiny V-shaped teeth cut into the blade). The notches act as a built-in depth gauge, making sure you leave behind the exact same thickness of liquid across the entire room.
Spread the epoxy evenly at a rate of about 100 square feet per gallon. Once it is spread, use a de-foaming spiked roller to roll over the liquid in two directions. This breaks any tiny surface tension bubbles and levels out the liquid perfectly.
Step 3: Broadcasting the Colored Sand to Refusal
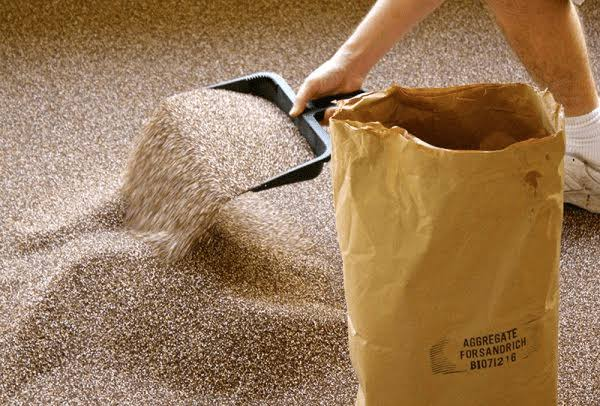
While your base coat is still completely wet and shiny, you must immediately start throwing your ceramic-coated colored quartz sand. In the professional flooring world, we call this broadcasting to absolute refusal. This means you keep throwing sand until the wet epoxy cannot absorb any more, and the entire floor looks dry like a beach.
The Professional “Rain” Technique
Never dump the sand out of a bucket onto the wet floor, and never throw it hard straight down! If you do, you will create huge waves and dark spots in the liquid resin.
Instead, grab a small handful of sand out of your bucket. Toss it high up into the air toward the ceiling, using a smooth, underhand sweeping motion. Let the sand gently rain down vertically onto the wet floor. This allows the heavy quartz granules to sink straight down into the epoxy cleanly without shifting the wet liquid underneath.
- The Math: You will need a lot of sand for this. A true full-broadcast system requires roughly 0.5 to 0.75 pounds of quartz sand per single square foot of flooring space. If you have a standard 400 square foot 2-car garage, you should have at least 200 to 300 pounds of colored sand ready to go!
Step 4: The Secrets of the Double Broadcast Method
Once you finish raining down your sand, leave the room completely alone. Let it cure for 12 to 16 hours. When you walk back in the next morning, the floor will look like a gigantic sheet of rough, colorful sandpaper.
Take a clean broom and a stiff flat floor scraper. Lightly scrape the surface to loosen any loose, standing grains of sand. Then, use a heavy-duty shop vacuum to clean up all the excess sand.
- The Pro Inside Track: Don’t throw away that clean, vacuumed sand! Since it never touched the wet epoxy, you can save it in a clean bucket and use it on your next project.
Why Double the Broadcast?
At this point, you can choose to do a single broadcast or a double broadcast quartz method. If you are doing a high-traffic garage, a commercial workshop, or a busy walkway, I highly recommend going for the double broadcast.
To do this, you simply repeat the entire process:
- Roll out a fresh layer of clear 100% solids epoxy right over your first sand layer.
- Rain down a second round of colored quartz sand into that wet coat until refusal.
- Let it cure, scrape, and vacuum again.
This second step doubles your floor’s final thickness, making it nearly bulletproof against heavy impacts, thermal shock, and serious structural wear.
Let’s look at a quick look at how the single vs. double broadcast methods stack up against each other:
| System Type | Total System Thickness | Sand Needed (per sq ft) | Best Uses |
| Single Broadcast | Around 1/16 of an inch | 0.50 lbs | Light residential garages, residential basements, backyard patios |
| Double Broadcast | Around 1/16 to 1/8 of an inch | 1.00 lbs (total) | Heavy automotive shops, commercial kitchens, dog kennels |
Related Article: Best DIY Epoxy Floor Kits
The Topcoat Lock, Maintenance, and FAQ
Your floor now looks like a beautiful, rustic stone bed. It is thick, strong, and perfectly flat. But right now, if you ran your bare hand across it, it would feel incredibly rough—almost sharp enough to cut skin. If you spilled oil or dropped a piece of food on it today, it would get permanently trapped in the tiny gaps between the sand grains.
We need to apply the ultimate finishing touch: the clear protective lock-coat. Let’s look at how to sand down the sharp edges, choose the right topcoat chemical, and keep your new floor looking flawless for the next twenty years.
Step 1: The Mechanical Scraping (Controlling the Grip)
Before you open your clear coats, you need to decide exactly how rough or smooth you want your finished floor to be. This is called controlling your slip resistance.
Put on your spike shoes one last time. Take a heavy-duty floor scraper or a pole-mounted sanding block fitted with 80-grit sandpaper and walk across the cured sand floor. Slide the blade firmly across the surface.
You are not trying to grind the sand away! You are just knocking down the tiny, sharp quartz peaks that are sticking straight up.
- The Texture Secret: If you want a super safe, non-slip floor for a wet area like a pool deck or commercial wash bay, just do a very light scraping. If you want a smoother floor for a home garage or basement that is easy to wipe down with a microfiber mop, scrape the floor a bit harder to flatten the sand profile out.
Once you are done scraping, run your industrial HEPA vacuum over the entire floor to remove every single speck of loose sand dust.
Step 2: Choosing Your Clear Armor Coat
This is a huge content gap on most home improvement websites. They usually just tell you to roll on a basic clear epoxy topcoat. That is terrible advice! Standard clear epoxy turns a nasty, dark amber-yellow color when it gets hit by sunlight over time. Within a couple of years, your beautiful colored sand will look yellow, dull, and aged.
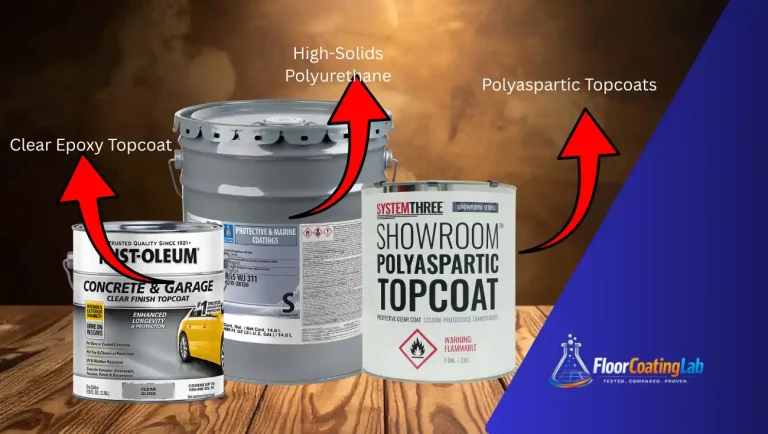
To avoid this, you must pick a UV-stable, non-yellowing topcoat. Let’s compare the three best professional options available today:
1. Clear Polyaspartic Lock-Coat (The Professional Champion)
This is my personal favorite choice for garages, patios, and showrooms. Polyaspartics are incredibly tough, highly flexible, and 100% stable against ultraviolet (UV) sunlight. They cure ultra-fast—usually within 2 to 4 hours—meaning you can walk on your finished floor the very same day. They also offer excellent chemical resistance against hot tires, gasoline, and harsh brake fluids.
2. High-Gloss Polyurethane
Polyurethanes are highly scratch-resistant and offer a beautiful, glass-like gloss finish. They are thinner than epoxies or polyaspartics, making them fantastic for a final lock-coat over a tight sand profile. The only downside is that they take a long time to dry (often 24 to 48 hours) and have an incredibly strong solvent smell during installation.
3. Clear 100% Solids Epoxy
If you are doing a basement or a room with absolutely zero windows and no direct sunlight, you can use a clear epoxy slurry topcoat. It builds thickness fast and fills in the sand texture quickly. However, never use it on a garage floor or outdoor patio where the sun peaks in!
Here is a quick reference table to help you pick the perfect clear protective shield for your space:
| Topcoat Material Type | UV Sunlight Resistance | Cure Time (To Traffic) | Scratch & Chemical Rating | Best Environmental Fit |
| Clear Polyaspartic | 100% Flawless (No Yellowing) | Ultra-Fast (2–4 Hours) | Outstanding / Industrial | Garages, Driveways, Sunny Showrooms |
| High-Gloss Polyurethane | Excellent (No Yellowing) | Slow (24–48 Hours) | High / Very Scratch Resistant | Interior Commercial Spaces, Workshops |
| Clear 100% Solids Epoxy | Poor (Will turn amber/yellow) | Moderate (12–24 Hours) | Medium / High Build | Basements, Enclosed Utility Rooms |
Step 3: Rolling Out the Final Topcoat
Once you have chosen your clear coat, it is time to lock it all down. Mixing a clear topcoat is just like mixing your base layers—keep a close eye on your pot-life!
- Pour the mixed clear liquid directly onto your textured sand floor in a long ribbon.
- Use a flat, squeegee to spread the clear liquid evenly. The liquid will naturally drop into the low valleys between the colored sand grains.
- Have a helper follow right behind you with a 3/8-inch nap, lint-free paint roller to back-roll the clear liquid. This pulls up any excess pools and ensures a completely flat, beautiful, consistent finish across the room.
Related Article: Concrete Sealer vs Epoxy: Pros, Cons, and Cost?
Long-Term Maintenance: How to Keep it Beautiful
Congratulations! Your quartz epoxy flooring system is officially complete. Once it cures for 24 to 72 hours (check your specific product label for heavy vehicle weight restrictions), you can drive your cars, bring in your tools, and enjoy your stunning space.
Maintaining a textured quartz sand floor is incredibly easy because there are no seams for dirt to hide in.
- Weekly Cleaning: Use a soft-bristle push broom or a leaf blower to blow out loose dust, dirt, and leaves.
- Deep Cleaning: Mix a bucket of warm water with a few drops of a clear, pH-neutral dish soap or a specialized resin floor cleaner. Avoid using floor cleaners containing heavy oils, acids, or citrus ammonia, as they can leave a dull, soapy film over your beautiful clear gloss. Use a microfiber string mop to wash down the texture, rinse with clean water, and let it air dry.
Frequently Asked Questions (FAQ)
How much colored sand do I actually need per square foot?
For a professional, heavy-duty full-broadcast system, you should plan to use between 0.50 to 0.75 pounds of quartz sand per square foot for a single broadcast. If you are doing a double broadcast method, you will need a full 1.0 to 1.25 pounds of sand per square foot to cover the liquid to absolute refusal. Always buy 10% extra sand just to be safe!
Can I apply this colored sand epoxy over my old wood or tile floor?
I strongly advise against it! Wood expands, contracts, and flexes whenever the humidity changes. Epoxy is a rigid, rock-hard plastic. If the wood underneath moves, your epoxy will crack and split apart. Ceramic tile can sometimes be coated, but you have to grind off the slick glaze from every single tile and fill all the grout lines first. It is always best to stick to solid concrete slabs.
How long does a quartz sand floor take to cure before I can drive my car on it?
Even if the floor feels dry to the touch after 4 to 8 hours, the chemicals are still hardening on a microscopic level. For standard light foot traffic, you can usually walk on the floor after 24 hours. However, you should wait a full 3 to 5 days before parking heavy trucks, turning hot car tires, or dragging heavy toolboxes across the surface.
Is a textured colored sand floor hard to sweep?
Not at all! As long as you scraped the sharp peaks down before applying your clear polyaspartic lock-coat, the floor will feel like an orange peel texture. It is smooth enough for a regular broom or mop to slide across easily, but rough enough to stop your shoes from slipping when the floor gets wet.
Conclusion
Learning how to apply epoxy colored sand floor paint is one of the most rewarding transformations you can perform on a property. By stepping away from cheap retail floor paints and embracing a true commercial quartz epoxy flooring system, you are building a floor asset that will look stunning and protect your slab for decades.
Just remember the sacred laws of resin coatings: spend all your energy on the diamond grinding prep work, respect your chemical pot-life clock, walk high on your steel spike shoes, and seal it all with a UV-stable clear polyaspartic lock-coat.
Get out there, take your time, protect your eyes and hands with proper safety gear, and build a floor that you can be incredibly proud of!

One Comment
Comments are closed.