Tiling a new floor can transform your space, making it look fresh and stylish. But before you start, there are important things you need to know to avoid costly mistakes.
Are you sure your floor is properly prepared? Do you know which tiles will work best for your room? Getting these details right will save you time, money, and frustration. Keep reading to discover the key factors that will help you create a beautiful, long-lasting tiled floor you’ll love.
Choosing Tile Types
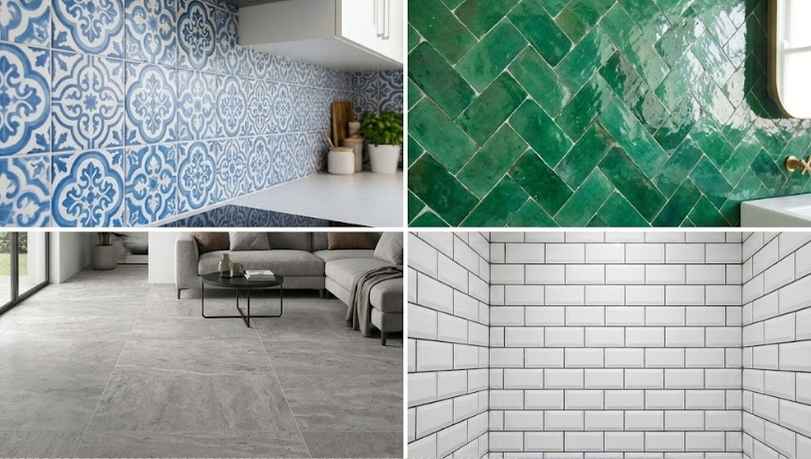
Choosing the right tile type is key for a new floor. It affects the look, feel, and durability of your space. Tiles come in many materials, sizes, and shapes. Each type suits different rooms and uses. This guide helps you pick the best option for your floor.
Ceramic Vs Porcelain
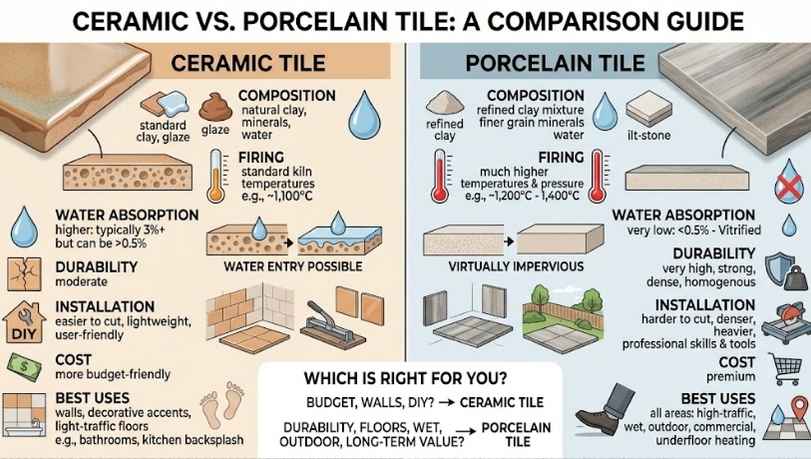
Ceramic tiles are made from clay and fired at low temperatures. They are softer and easier to cut. Ceramic works well for low-traffic areas like bedrooms and walls. Porcelain tiles are denser and fired at higher temperatures. They resist moisture and wear better. Porcelain suits kitchens, bathrooms, and busy floors.
Natural Stone Options
Natural stone tiles include marble, granite, slate, and travertine. Each stone has unique patterns and colors. Stone tiles add a natural, elegant look. They need sealing to prevent stains and damage. Stone suits living rooms and hallways. It may require more care than ceramic or porcelain.
Tile Size And Shape
Tiles come in many sizes: small mosaics to large slabs. Large tiles make a room look bigger and have fewer grout lines. Small tiles offer more design variety and grip in wet areas. Shapes like squares, rectangles, and hexagons create different styles. Choose size and shape to match your room’s style and function.
Preparing The Subfloor
Preparing the subfloor is a key step before tiling a new floor. A good base helps tiles last longer and look better. It stops tiles from cracking or moving later. Take time to prepare the subfloor well. This saves effort and money in the future.
Cleaning And Leveling
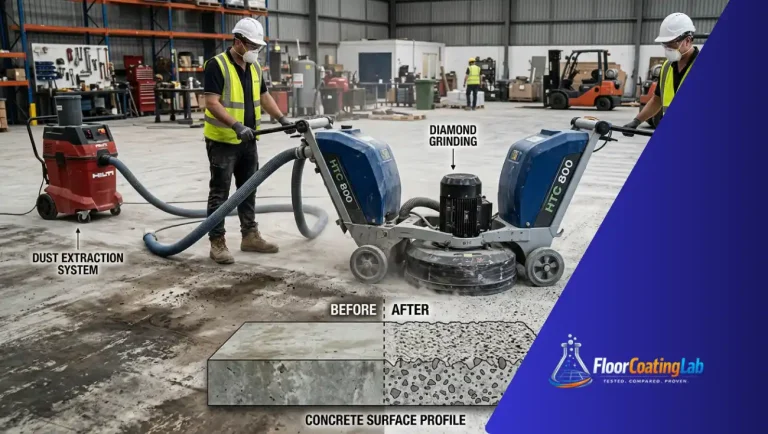
Remove all dirt, dust, and debris from the subfloor first. A clean surface helps tile glue stick properly. Sweep and vacuum the area carefully.
Check for bumps or dips on the floor. Use a leveling compound to make the surface flat. A flat floor stops tiles from cracking or coming loose.
Moisture Barriers
Moisture can ruin tiles and grout over time. Use a moisture barrier on the subfloor to stop water from coming up. This is very important in bathrooms and kitchens.
Install a plastic sheet or special membrane for protection. It helps keep the floor dry and safe from damage.
Repairing Damage
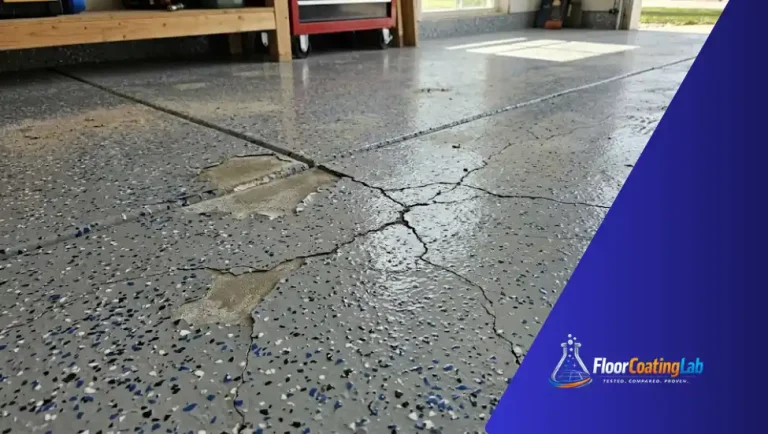
Look for cracks, holes, or weak spots on the subfloor. Fix these problems before tiling. Use patching compounds or replace damaged sections.
A strong and smooth base keeps tiles secure and prevents future problems. Do not skip this step for a good tile job.
Related Article: How to Remove Polyurethane from Concrete: DIY & Pro Guide
Tools And Materials Needed
Tiling a new floor needs the right tools and materials. Without them, the job becomes hard and messy. Using good quality items makes the floor last longer and look better.
Each tool and material plays a special role in the tiling process. Knowing what to use helps you work faster and avoid mistakes. It also keeps the tiles in place and ensures smooth finishes.
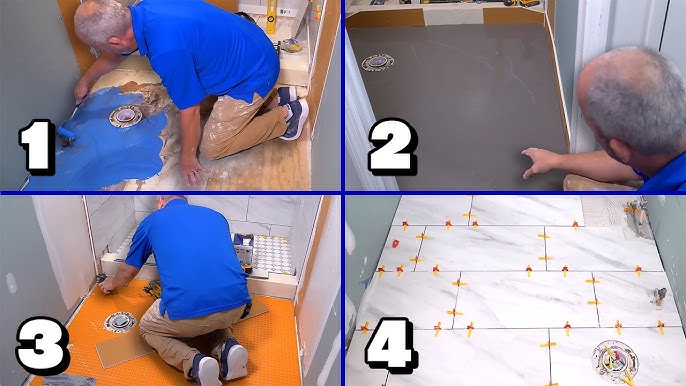
Essential Tools
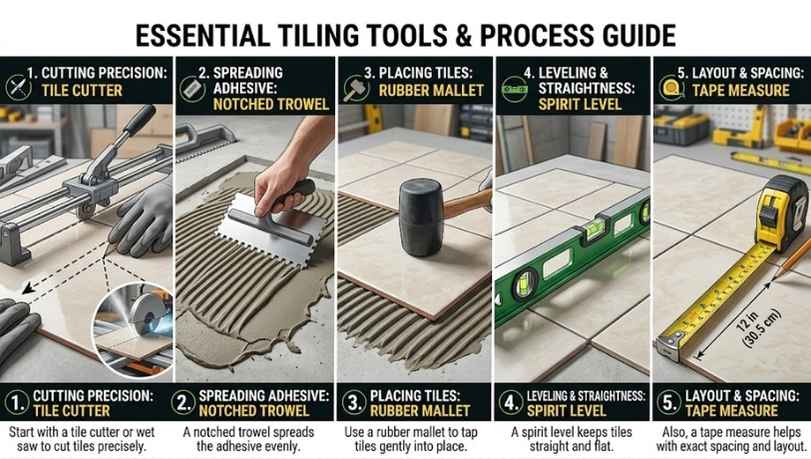
Start with a tile cutter or wet saw to cut tiles precisely. A notched trowel spreads the adhesive evenly. Use a rubber mallet to tap tiles gently into place. A spirit level keeps tiles straight and flat. Also, a tape measure helps with exact spacing and layout.
Adhesives And Grout
Choose the right adhesive for your tile type and floor surface. Thin-set mortar works well for most floors. Grout fills gaps between tiles and keeps dirt out. Pick grout color that matches or contrasts your tiles. Mix grout to a smooth, thick paste for easy application.
Safety Equipment
Wear safety glasses to protect eyes from dust and chips. Use gloves to avoid skin irritation from adhesives and grout. Knee pads make kneeling comfortable during long work hours. A dust mask keeps you safe from inhaling fine particles. Dress in long sleeves to protect your arms.
Credit: www.youtube.com
Layout Planning
Planning the layout is a key step before tiling a new floor. It helps avoid mistakes and saves time. A good plan makes the floor look neat and balanced. Taking time to plan ensures the tiles fit well in the space. This section covers how to measure, test, and create tile patterns.
Measuring And Marking
Start by measuring the floor length and width. Use a tape measure for accuracy. Mark the center point of the room on the floor. Draw straight lines crossing at the center. These lines guide tile placement and keep tiles even. Mark tile edges lightly with a pencil for reference.
Dry Laying Tiles
Lay tiles on the floor without glue first. This shows how tiles fit the space. Check for awkward cuts or gaps around edges. Move tiles to improve balance and avoid small leftover pieces. Dry laying helps visualize the final look. It saves time by fixing errors before gluing.
Creating Patterns
Choose a tile pattern that suits your room style. Straight, diagonal, or brick patterns work well. Patterns add interest and hide dirt better. Start from the center and work outward for symmetry. Keep tile spacers consistent to maintain even gaps. Patterns make the floor more attractive and professional.
Installation Techniques
Installing tiles on a new floor requires careful attention to detail. Good installation techniques help the floor last longer and look better. Following clear steps ensures tiles stay strong and even. This section covers key methods to apply adhesive, set tiles, and keep spacing right.
Applying Adhesive
Use the right adhesive for your tile type and floor surface. Spread the adhesive evenly with a notched trowel. Work in small sections to prevent drying before tiles go down. Press the adhesive firmly to avoid gaps. Avoid using too much adhesive, which can cause uneven tiles.
Setting Tiles
Place each tile gently onto the adhesive. Press down slightly to secure it. Tap tiles with a rubber mallet for better contact. Check each tile’s level with a spirit level. Adjust tiles before adhesive sets hard. Start from the center or a straight edge for best results.
Spacing And Alignment
Use tile spacers to keep consistent gaps between tiles. Proper spacing helps grout fill evenly. Align tiles in straight rows for a neat look. Check alignment often during installation. Uneven spacing can make the floor look messy and cause grout problems later.
Related Article: What is Self-Leveling Epoxy Floor Coating?
Grouting And Sealing
Grouting and sealing are key steps in tiling a new floor. They help keep tiles in place and protect them from dirt and water. Good grouting fills gaps between tiles, giving the floor a clean look. Sealing adds a layer of protection to keep the grout and tiles strong. Both processes increase the floor’s durability and beauty.
Choosing Grout Colors
Pick grout colors that match or contrast with your tiles. Light grout makes the floor look bigger and brighter. Dark grout hides dirt and stains better. Consider the room’s style and tile color. Test a small area first to see how the color looks after drying. The right grout color can change the whole floor’s look.
Grout Application Tips
Apply grout evenly using a rubber float. Press grout firmly into gaps to avoid air pockets. Work in small sections for better control. Wipe off extra grout with a damp sponge before it dries. Wait at least 24 hours before walking on the tiles. Clean tools and hands often to prevent stains.
Sealing For Protection
Seal grout and tiles to stop water and dirt from soaking in. Use a sealer designed for your tile type. Apply sealer with a brush or roller evenly. Let it dry fully before using the floor. Reapply sealer every year to keep protection strong. Sealing keeps the floor looking fresh longer.
Maintenance Tips
Maintaining a new tiled floor keeps it looking fresh and lasts longer. Proper care prevents stains, cracks, and dullness. Simple habits help protect your investment and keep the floor safe to walk on.
Cleaning Methods
Sweep or vacuum regularly to remove dirt and dust. Use a damp mop with warm water and mild soap. Avoid harsh chemicals that can damage grout or tiles. Dry the floor after cleaning to prevent water spots. Clean spills quickly to stop stains from setting in.
Preventing Damage
Use furniture pads to avoid scratches from heavy items. Avoid dragging furniture across the floor. Place mats at entrances to catch dirt and grit. Do not use abrasive tools or steel wool on tiles. Keep sharp objects away to prevent chips or cracks.
Long-term Care
Seal grout lines every few years to keep them strong. Inspect tiles for cracks or loose spots regularly. Repair damaged grout to stop water from seeping under tiles. Reapply sealant on tiles if they start to look dull. Keep humidity low in rooms to prevent tile lifting.
Credit: blog.innovatebuildingsolutions.com
Frequently Asked Questions
What Type Of Tile Is Best For New Floors?
Porcelain and ceramic tiles are popular for new floors. They are durable, water-resistant, and easy to clean. Choose based on your room’s use and style preferences. Porcelain is denser and ideal for high-traffic areas, while ceramic suits moderate use and offers more design options.
How Do I Prepare The Floor Before Tiling?
Ensure the floor is clean, dry, and level before tiling. Remove any old flooring, debris, or dust. Repair cracks and fill holes to create a smooth surface. Proper preparation helps tiles adhere better and prevents future damage or unevenness.
What Grout Color Works Best With Floor Tiles?
Choose grout color that complements or contrasts with your tile for visual appeal. Light grout brightens the space but may stain easily. Dark grout hides dirt and suits rustic or industrial looks. Match grout to tile style and room lighting for best results.
How Long Does It Take For Floor Tiles To Set?
Tile adhesive typically takes 24 to 48 hours to set completely. Avoid walking on tiles during this period for proper bonding. Grouting can begin once the adhesive is fully cured. Follow manufacturer instructions for drying times to ensure durability.
Conclusion
Tiling a new floor takes careful thought and planning. Choose the right tiles for your space and budget. Prepare the surface well to avoid problems later. Measure the area accurately to reduce waste. Use proper tools to make the job easier.
Take your time and work step by step. Small details matter for a smooth, long-lasting finish. A well-done floor adds beauty and value to your home. Follow these tips to create a floor you will enjoy for years.