

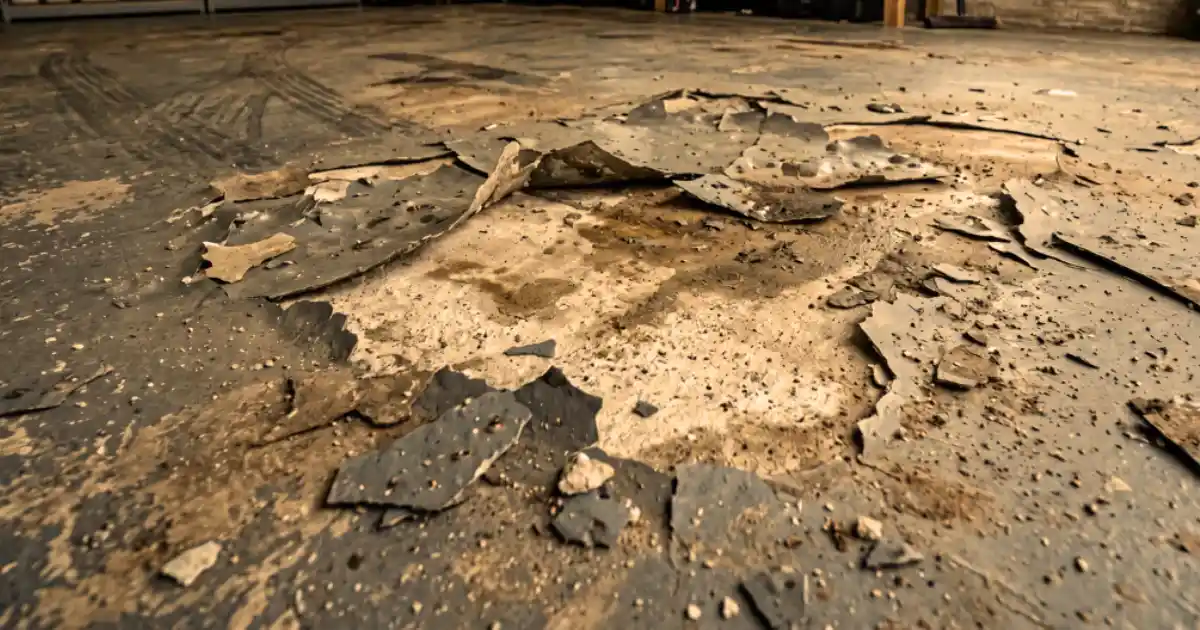
You spent a weekend on your garage floor. Maybe you spent a few thousand dollars. It looked like a showroom.
Then you parked, pulled out, and saw a curl of coating stuck to your tire. Ouch.
So, why does garage floor coating delaminate? The short answer is that the coating lost its grip on the concrete. Water from below, smooth concrete, hot tires, or a rushed job can all cause it.
The good news is that you can stop it. In this guide, I’ll walk you through seven causes in plain words. Then we’ll look at how to read a failed floor, decide between a repair and a redo, and keep it from happening again.
First, What Does “Delaminate” Even Mean?
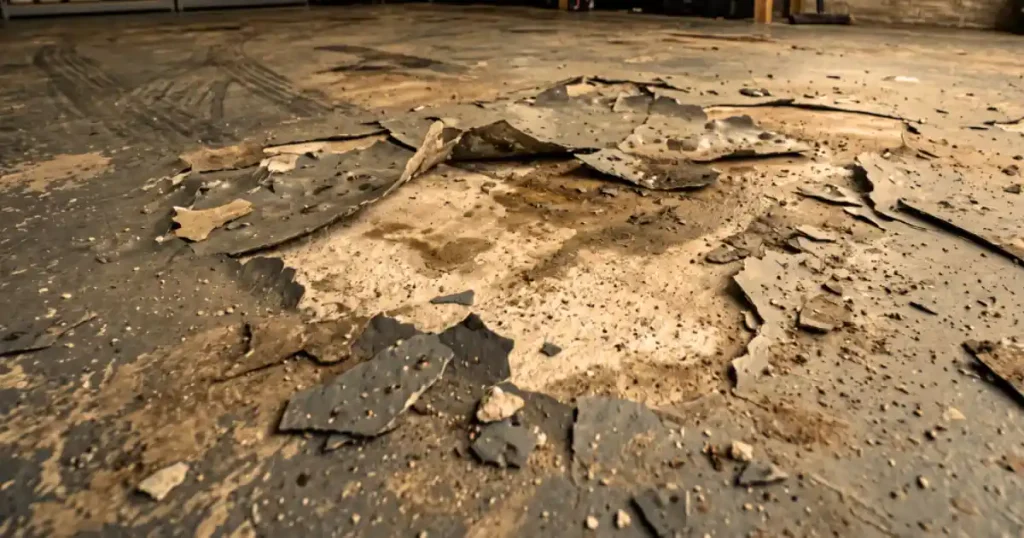
Coating Delaminating
Think of a sticker. When it peels off a wall, the sticker is fine. The glue gave up.
A floor coating works the same way. Delamination means the coating separates from the concrete. People use a bunch of words for it, and they aren’t all the same thing.
| Problem | What you see | What it usually means |
|---|---|---|
| Delamination | Coating lifts in sheets, often in corners or random spots | The bond to the concrete failed |
| Peeling | Edges curl up, or strips pull away | Same bond problem, often early stage |
| Blistering | Bubbles or domes in the coating | Moisture vapor or trapped air pushing up from below |
| Hot tire pickup | Coating sticks to tires and lifts under the wheels | A weak bond, plus heat |
Here’s something most people miss. Hot tires usually don’t cause the failure. They expose a weakness that was already there. The tire is the messenger, not the villain.
Cause 1: Moisture Vapor Pushing Up From Below
Concrete looks solid. But it works more like a hard sponge.
Water moves through it as vapor, even when the surface feels bone dry. If you put a dense coating on top, that vapor has nowhere to go. It collects under the coating and builds pressure. That pressure causes blisters or delamination across big areas.
Think of a balloon pressing up under a rug. Sooner or later, something lifts.
Why a Dry-Looking Slab Fools Almost Everyone
Here’s the sneaky part. You can’t see moisture vapor transmission. There’s no puddle and no dark spot. The floor can feel perfect.
Many garage slabs sit right on the ground. Some older ones have no plastic barrier under them. So hydrostatic pressure from wet soil keeps pushing water upward, day after day.
Warning signs you can spot:
- Bubbles or blisters that show up in hot or humid weather
- Dark, damp-looking concrete under a loose chip
- A musty smell near the floor
- White powdery stuff (called efflorescence) on bare concrete
How to Test Your Slab (It’s Easier Than You Think)
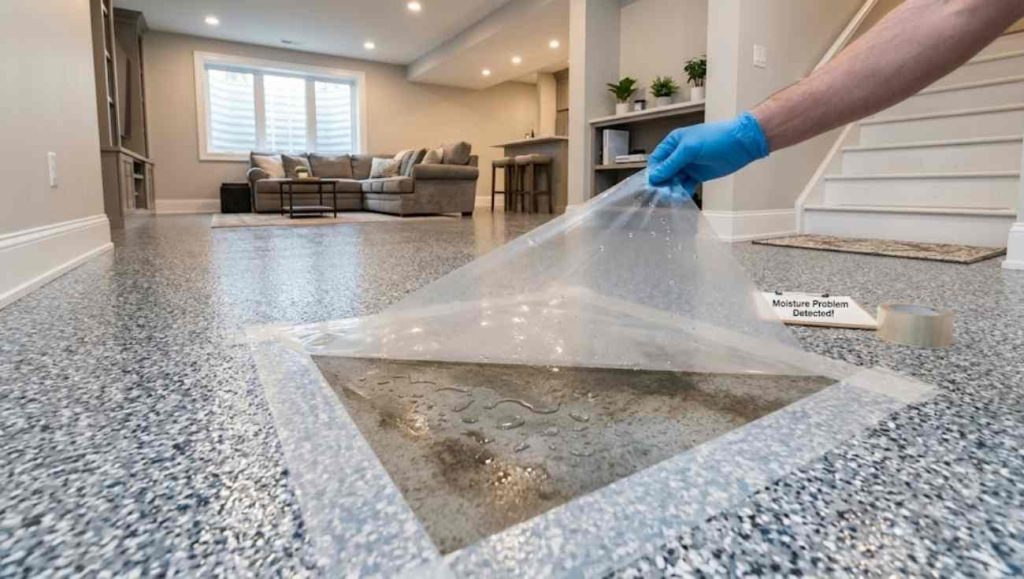
I’m going to be blunt. Never skip the moisture test. It costs very little, and a redo costs a lot.
Test 1: The plastic sheet test. Tape a heavy plastic sheet, about 2 feet by 2 feet, tightly to the floor. Seal all the edges. Wait 24 hours. Droplets or dark patches under the plastic mean moisture is rising.
Test 2: The calcium chloride test. This one gives you a real number. It measures how much moisture leaves your slab, in pounds per 1,000 square feet per 24 hours. It’s often done following a standard called ASTM F1869. Here’s a simple guide:
| Reading | What it means | What to do |
|---|---|---|
| Under 3 lbs | Usually fine for most coatings | Check your product’s data sheet |
| 3–10 lbs | Moderate moisture | Use a moisture-mitigating primer |
| Over 10 lbs | High moisture | May need an industrial vapor barrier, or the slab may not suit resin coatings at all |
Limits change from brand to brand, so always read the label for your coating. And if your test comes back high? A normal primer won’t save you. You need a primer made to block vapor.
Quick summary: Water vapor builds pressure under the coating and breaks the bond. Test first. Use a vapor-blocking primer when the numbers say so.
Related Article: Best Polyaspartic Garage Floor Coating
Cause 2: Weak Concrete Prep (The Boring Reason Behind Most Failures)
Want to know what pros say again and again? The coating is only as good as the prep.
Here’s why. A coating needs something to grab. Smooth, dusty, or sealed concrete gives it nothing. If you skip real prep, the coating just sits on top of dirt and old sealers.
That’s a floor waiting to peel.
How Rough Should the Concrete Be?
Pros often aim for a texture that feels like 120-grit sandpaper. That’s called the concrete surface profile. It gives the resin tiny hills and valleys to lock into. When floors are too smooth, the coating has no grip, and it lets go under real-world stress.
Grinding vs. Acid Etching
Both prep methods are out there. Here’s how I see it.
- Diamond grinding: My pick. It removes old sealers and gives an even texture.
- Acid etching: It can work on clean, bare concrete. But it’s messy, and the results are often uneven. DIY kits make this easy to get wrong.
If you rent a grinder, use a dust shroud and a shop vac. Concrete dust is nasty stuff. Wear a good mask.
The Easy Water Drop Test
Not sure if your floor is ready? Sprinkle a few drops of water on it.
- Water soaks in: The concrete is open and ready.
- Water beads up: Something is blocking it. The floor isn’t ready to coat. Grind more.
It takes ten seconds. Do it in a few spots, especially where oil may have dripped.
Quick summary: Smooth or sealed concrete gives the coating nothing to hold. Grind it until it feels rough, then use the water drop test to check.
Cause 3: Hot Tire Pickup (When Your Car Fights Back)
You drive home. The tires are hot. You park, and an hour later the tires cool down.
Here’s what happens next. As the rubber cools, it shrinks a little and grabs the surface of the coating. If the coating is firmly bonded to the concrete, nothing happens. If it isn’t, the tire wins, and a chunk comes up when you pull out.
Remember, the tire is usually just exposing a weak bond. If you see pickup under the wheels, check the rest of the floor too. The bond is probably weak elsewhere.
Why Summer Makes It Worse
Hot weather means hotter tires and a softer coating. It’s a bad mix.
There’s also a chemistry piece. Tire makers add plasticizers and paraffin to rubber. These ingredients can transfer into the coating. A thin or cheap coating gets soft and gummy, and then it lets go.
Why Some Coatings Suffer More Than Others

Not every product has the same problem. Acrylic and alkyd paints don’t form as many cross-links as other coatings. That’s why epoxies, polyurethanes, and polyureas resist hot tire pickup much better.
Here’s how I’d compare the options:
| Coating type | Hot tire resistance | My take |
|---|---|---|
| Acrylic or alkyd garage paint | Weak | Fine for a shed floor. Not for a car. |
| Thin DIY epoxy kit | Hit or miss | Works only with great prep |
| Quality epoxy, full thickness | Good | A solid base layer |
| Epoxy base + polyaspartic topcoat | Very good | Worth the extra money, in my opinion |
A hard, cross-linked topcoat helps a lot. A flake system with a hard polyaspartic topcoat generally holds up better than a smooth, single-coat floor.
Quick summary: Heat and tire chemicals attack weak bonds and soft coatings. Good prep and a hard topcoat are your best defense.
Cause 4: Driving on It Too Soon

Here’s a hard question. Can you wait?
A floor can feel dry to the touch long before it’s fully cured. Rolling a car onto it early is one of the most common causes of lifting. The floor needs time to reach its full hardness before heat and weight hit it.
My advice:
- Read the data sheet. Light foot traffic and car traffic have different wait times.
- Keep the garage closed and clear. Cats, kids, and dust all love wet coatings.
- If you’re unsure, wait one more day. It costs you nothing.
Quick tip: Fast-curing products can shorten the wait. But they still have a stated time. Don’t guess.
Related Article: Drylok Concrete Floor Paint vs Epoxy
Cause 5: The Wrong Weather on Install Day
Chemistry hates surprises. And weather is full of them.
Too Humid
Damp air can land on a fresh coating. When that happens, the coating can turn cloudy. Pros call this blushing. A cloudy surface isn’t just a looks problem. It can signal a weak finish.
Many data sheets also say the floor should sit several degrees above the dew point. If the slab is cooler than that, moisture forms on the surface. Check your product’s rules before you start.
Too Hot
Heat speeds everything up. In a hot garage, a mixed bucket might stay liquid for only 15 to 20 minutes. Then it “flashes,” which means it starts to harden before you can spread it. You end up with a thick, lumpy layer that doesn’t bond well.
A simple weather checklist:
- Check the air and the slab temperature
- Look at humidity and the dew point
- Start early in the day when it’s hot
- Shade the garage door if the sun hits the floor
Cause 6: Mixing and Thickness Mistakes
Two-part coatings are picky. They need the right mix ratio. They also need to be spread at the right thickness.
The Wrong Ratio
Too much hardener or too much resin leaves the coating soft or sticky. And it might look fine at first. The ratio matters, so measure it. Don’t eyeball it.
Buying Too Little
Here’s one that happens all the time. A homeowner buys a kit for a two-car garage and stretches it over three. That’s one of the most common causes of failure. Thin coats are weak coats.
Putting It On Too Thick
Wait, can you go too thick? Yes. In some cases, a heavy coat can leave a weak layer in the middle. Then the top surface can delaminate and peel.
Follow the spread rate on the label. It’s not a suggestion.
Cause 7: Old Oil, Sealers, and Hidden Gunk
Concrete soaks up stuff. A garage floor that has held cars for years is probably packed with automotive fluids. You can’t see all of it.
Coating can’t bond to oil. It just floats on top.
Other hidden troublemakers:
- Old sealers or paint from earlier owners
- Curing compounds on newer concrete, which can block the bond
- Wax or silicone from car cleaning products
Brand-new concrete has its own rules too. Many guides say new slabs need around 4 to 6 weeks to cure before coating, so check your product’s guide.
What to do:
- Degrease the floor first.
- Grind it well to remove sealers and open the pores.
- Run the water drop test from Cause 2.
- If you see dark, oily spots, treat or grind them again before coating.
Quick Reference: Causes 3 to 7
| Cause | Warning sign | Prevention |
|---|---|---|
| Hot tire pickup | Coating sticks to tires | Strong bond, hard topcoat |
| Driving on it too soon | Marks or lifting under tires | Wait the full cure time |
| Bad weather | Cloudy finish, flashing in the bucket | Check humidity, dew point, and heat |
| Mixing or thickness errors | Soft, sticky, or uneven spots | Measure the ratio, follow the spread rate |
| Oil and old sealers | Poor grip in patches | Degrease, grind, water drop test |
Section summary: Heat, timing, weather, mixing, and hidden contamination can all break a coating’s bond. None of them are hard to avoid. They just need patience.
How to Read a Failed Garage Floor Like a Detective
Okay, your floor is already peeling. Don’t panic. Your floor is actually giving you clues.
Flip a Loose Chip Over
Pick up a piece of loose coating. Look at the underside. It tells a story.
| What you see underneath | Likely cause |
|---|---|
| Clean, smooth, and no concrete stuck to it | Poor prep. The surface profile was too smooth. |
| Damp, dark, or white powdery residue | Moisture vapor or efflorescence |
| Greasy or oily feel, dark stains | Oil or contamination in the concrete |
| Coating layers split from each other, concrete not exposed | Bad bond between coats (dust, amine blush, or a missed recoat window) |
| A thin layer of concrete stuck to the back | Weak concrete surface. The coating held, the concrete didn’t. |
That last one surprises people. If the concrete itself crumbles, a better coating won’t fix it. You need to repair the concrete first.
Check Where It Fails
- Only under the tires: Likely hot tire pickup, which points to a weak bond or soft coating.
- Corners and random spots: Likely delamination from moisture or prep problems.
- Near the garage door: Sun and weather may be wearing it down, or water is getting in.
- Bubbles in summer: Classic moisture vapor.
Do a tap test too. Tap the floor with a hard object, like the handle of a screwdriver. A hollow sound means the coating isn’t stuck down, even where it looks fine.
Repair or Recoat? How to Decide
This is the question everybody asks. Here’s the honest answer: it depends on why it failed and how much has failed.
| Situation | Best move |
|---|---|
| A few small spots, solid bond everywhere else | Spot repair |
| Peeling in many areas, or a hollow sound across the floor | Remove the coating and start over |
| Moisture is the cause | Fix the moisture first. Patching won’t last. |
| Concrete is crumbling underneath | Repair or grind away the weak concrete first |
A common rule of thumb says that if more than about one-fifth of the floor is peeling, the bond is probably weak everywhere. At that point, patches just delay the problem.
How to Do a Spot Repair
- Find the cause. Skip this step and you’ll be back here next summer.
- Remove all loose coating. Scrape and tap until you reach a firm edge.
- Grind the area and “feather” the edges so they blend smoothly.
- Fix cracks and holes with a proper concrete repair product.
- Vacuum well. Dust is a bond killer.
- Prime (use a vapor-blocking primer if moisture was the issue).
- Recoat following the product’s directions, then let it cure fully.
Quick honesty moment: a spot repair rarely matches the old color perfectly. If that bugs you, plan a full topcoat over the whole floor.
How to Stop It From Happening Again
Prevention is boring. Boring works. Here’s your checklist:
- Test for moisture with the plastic sheet test and a calcium chloride test.
- Grind the concrete to a 120-grit-style texture.
- Degrease and clean the slab. Vacuum like you mean it.
- Use the right primer for your moisture level.
- Pick a system built for cars, ideally with a hard topcoat.
- Check the weather, including slab temperature and dew point.
- Mix by the book and spread at the stated rate.
- Wait for the full cure before you park.
Not feeling confident about the prep? Hiring a pro for grinding and moisture testing, then doing the rest yourself, is a smart middle path. Prep is where most failures start.
Section summary: The underside of a peeled chip points to the cause. Small, isolated failures can be patched. Widespread failures usually need a full redo. A good checklist prevents most problems.
Frequently Asked Questions
What is the number one reason a garage floor coating peels?
Moisture vapor rising through the slab is a top reason. It’s invisible, so people miss it. Weak prep is a close second.
Is hot tire pickup the same as delamination?
Not exactly. Hot tire pickup is when a coating lifts under warm tires. It usually shows the bond was already weak, so it often points to a bigger delamination problem.
Can I just recoat over a peeling garage floor?
No. A new coat over a failing bond will fail too. Remove the loose areas, fix the cause, grind, and then recoat.
How do I check my concrete for moisture?
Tape a 2 ft by 2 ft piece of heavy plastic to the floor for 24 hours. Look for droplets or dark spots. For real numbers, use a calcium chloride test kit.
How long should I wait before driving on a new coating?
Follow the product’s data sheet. Driving on a floor too early is a common cause of hot tire pickup and lifting.
Does grinding really matter that much?
Yes. A properly profiled floor lets the resin anchor deep into the concrete. It’s the best defense against peeling.
Will a polyaspartic topcoat stop my floor from peeling?
It helps with hot tire resistance and UV. But no topcoat can fix a bad bond. Moisture and prep problems underneath will still win.
Conclusion: Moisture, Prep, and Patience
So, why does garage floor coating delaminate? Almost always it comes down to three things: moisture, prep, and patience. Test your slab. Grind it right. Mix carefully. Let the coating cure fully.
Skip those steps, and even a pricey coating can lift. Do them well, and your floor can look great for years.
The best part? You can check your own floor this weekend. Flip a chip, try the tap test, and see what clues you find.
Which failure sign have you seen in your garage? Tell us in the comments. And if you’re planning a new coating, run through the checklist above before you start.


One response to “Why Does Garage Floor Coating Delaminate? 7 Causes & Fixes”
[…] the full story on why coatings let go? Read our guide on why garage floor coating delaminates. Here, we’ll stick to the two prep […]