

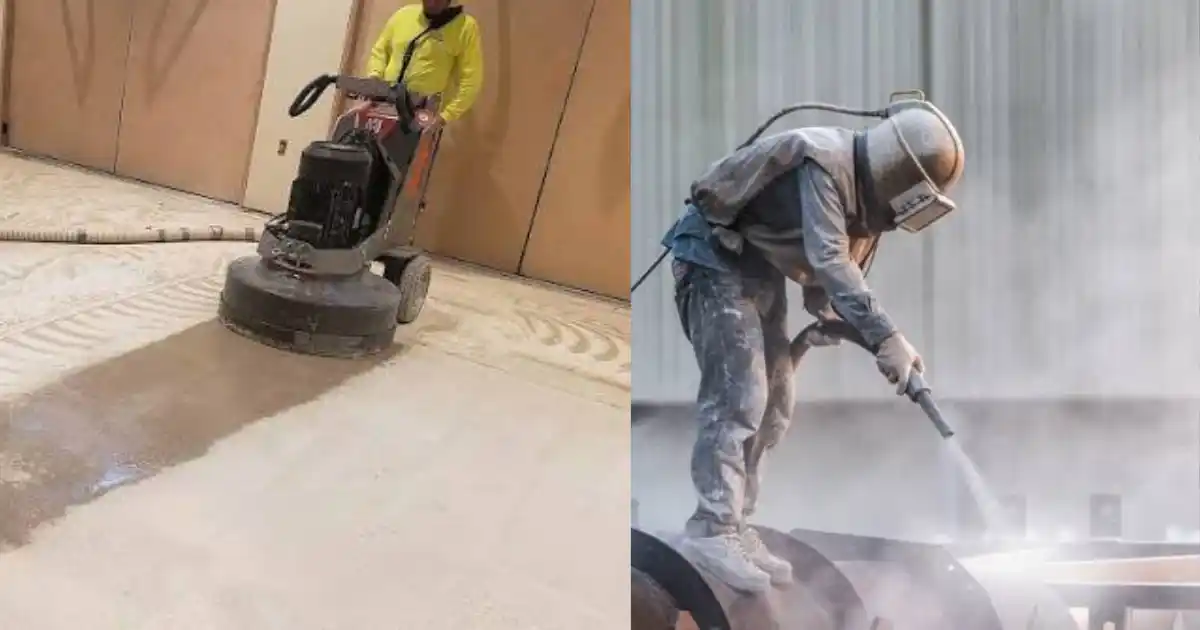
Picture this. You bought a great coating kit. You cleaned the floor. You even did it on a nice sunny weekend.
Then six months later, the coating peels. What went wrong? Most of the time, it’s not the product. It’s what happened to the concrete before the product went on.
That brings us to the big question: diamond grinding vs shot blasting. Both roughen concrete so a coating can grab it. But they work in very different ways, and picking the wrong one can cost you real money. Let’s break it down in plain words.
Why Surface Profile Matters (The Quick Version)
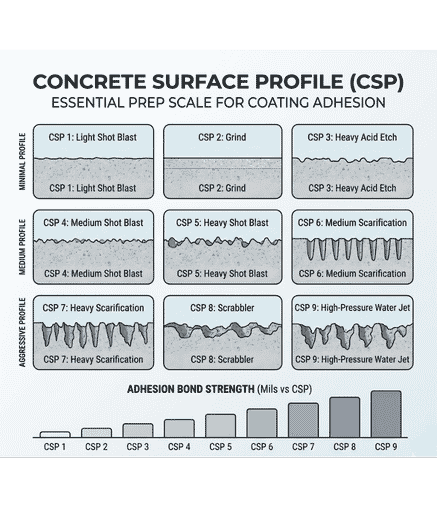
A coating can’t stick to a smooth, dusty surface. It needs tiny hills and valleys to hold onto. Pros call this the concrete surface profile, or CSP.
The International Concrete Repair Institute (ICRI) uses a scale to describe it. The scale has 10 levels, from light acid etching up to heavy milling. A low number means a smoother surface. A high number means a rougher one.
Why do you care? Because a surface that’s too smooth won’t hold the coating. And one that’s too rough can show through thin coats. Using the wrong prep method can lead to too little profile, coating failures, and even voided warranties.
Want the full story on why coatings let go? Read our guide on why garage floor coating delaminates. Here, we’ll stick to the two prep methods.
What Is Diamond Grinding?
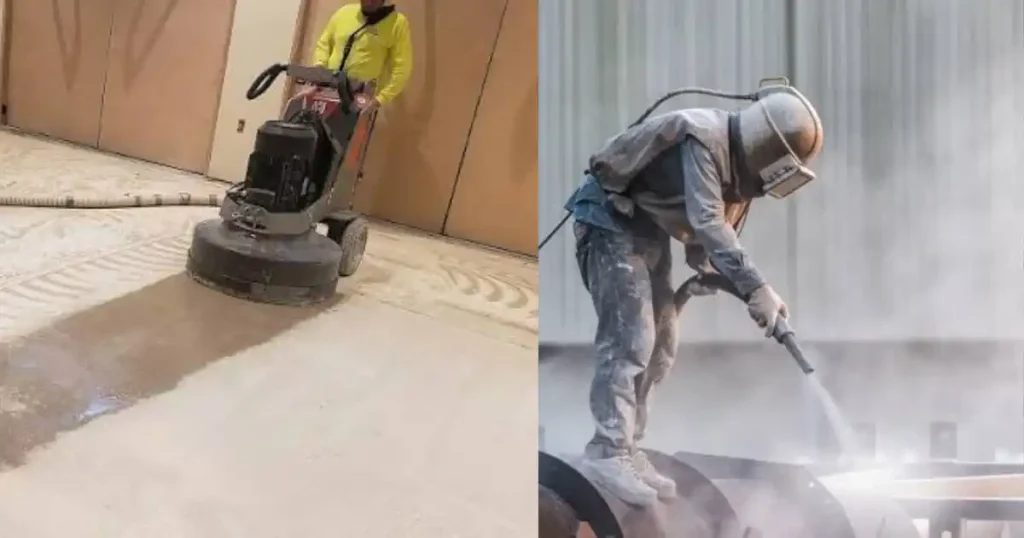
Diamond Grinding vs Shot Blasting
Think of it as a very tough floor sander.
A diamond grinder uses spinning discs loaded with diamond-tipped segments. The diamonds scratch away the top layer of concrete. That removes dirt, old residue, and small bumps.
What It Can Do
- Remove laitance (the weak, chalky top layer on concrete)
- Strip old paint, coatings, and glue. It can remove almost anything except steel bolts.
- Create a smooth, even profile, often in the CSP 1 to 3 range
Not every source agrees on the exact numbers. Some list grinding at CSP 1 to 3, and others at CSP 1 to 2. The tooling and number of passes make the difference.
Tool Bond in Plain Words
Diamond tools come in soft, medium, and hard bonds. Here’s the simple trick: a soft bond for hard concrete, a hard bond for soft concrete. It sounds backward, but it works. The tool wears faster so fresh diamonds keep cutting.
Different tooling also gives a different finish. Not sure which to rent? Ask the rental counter what fits your slab.
The Polishing Trap
Here’s a mistake I see a lot. Use tooling that’s too fine, and you can polish the concrete. It looks great. But a polished floor is bad for coatings. They slide right off it.
Grind with the coarse tooling your product calls for. Then stop.
What about dust? Grinding can leave fine dust behind if the vacuum isn’t strong enough. And dust under a coating is a bond killer. Use a good vacuum.
What Is Shot Blasting?
If grinding is a sander, shot blasting is more like a tiny hailstorm.
A shot blaster fires small steel balls (called shot) down onto the concrete, hammering the surface. The shot bounces back into the machine to be used again. The machine also pulls dust and debris into a dust collection system, so the job stays fairly clean.
What It Does Best
- Cuts a deeper, rougher profile. One technical sheet lists it at CSP 3 to 7, while another says CSP 3 to 5.
- Removes weak concrete and tough contamination fast
- Works well on big, open floors
- Needs no chemicals
- Tends to cut through old coatings faster than grinding
Where Shot Blasting Can Go Wrong
It’s not perfect. Be aware of these:
- A poor job can leave “cornrows,” which are streaky, uneven passes.
- It can’t reach edges and corners, so you need edge grinding afterward.
- It’s not ideal when you want a smooth profile.
- The process can be hot enough to make some existing coverings sticky.
Shot Blasting vs Sandblasting
People mix these up all the time. They’re different. Shot blasting uses metal shot fired by spinning turbine wheels. Sandblasting usually uses gentler abrasives pushed by compressed air or water. So if someone says “I’ll sandblast your floor,” ask what they really mean.
Diamond Grinding vs Shot Blasting, Side by Side
Here’s the quick comparison:
| Factor | Diamond grinding | Shot blasting |
|---|---|---|
| Typical profile (CSP) | Smooth to medium, about 1–3 | Rougher, about 3–5 or higher |
| Look of the profile | Even and consistent | Can show streaks if done poorly |
| Best for | Thin coatings, primers, recoats, old coating removal | Thick systems, heavy contamination, weak concrete |
| Edges and corners | Reachable with hand grinders | Need edge grinding afterward |
| Dust | Needs strong vacuum | Built-in dust collection |
| Main risk | Polishing the surface | Streaks or a surface that’s too rough |
| Handling for homeowners | Smaller, easier to find | Heavy machine, bigger job |
My honest take? For a typical home garage, I lean toward diamond grinding. It’s easier to handle, easier to control, and it matches most standard coatings. Shot blasting shines on big jobs and thick, high-build systems. But hey, I’m just one voice. Your product’s data sheet always has the final word.
Do you know what profile your coating needs? That’s the first question to answer. Everything else follows from it.
Section summary:
- CSP describes how rough your prepped concrete is. Too smooth or too rough both cause trouble.
- Diamond grinding gives a smoother, more even profile and removes old coatings. Watch out for polishing and dust.
- Shot blasting gives a deeper profile fast, with built-in dust collection. Watch for streaks and edges.
- The right choice depends on your coating and your floor.
Which Method Fits Your Coating?

Here’s the rule that settles most arguments: the thickness of your coating matters more than anything else.
A thin coat can’t hide a rough surface. A thick coat can fill one. In short, the choice comes down to the thickness of the system you’re installing.
| Coating type | Usual pick | Why |
|---|---|---|
| Primers, urethanes, thin-mil coatings | Diamond grinding | Leaves a smoother profile that thin paints can hide |
| Standard garage epoxy | Grinding (sometimes a light shot blast) | Most epoxy systems call for a medium profile |
| Decorative flake floors and recoats | Grinding | Usually the pick for thin coats, recoats, and decorative broadcast finishes |
| Moisture-blocking primers, self-leveling, urethane cement | Shot blasting | Needs a deeper profile for high-vapor primers and thick systems |
The Polyaspartic Puzzle
Here’s where it gets messy. Ask five installers about polyaspartic and you may get five answers.
One contractor says polyaspartic needs CSP 4 to 5, with aggressive shot blasting. A coatings maker says its system wants CSP 2 to 3, and it recommends diamond grinding for the best results.
Who’s right? Probably both, for their own products. Systems differ. Some are thick and some are thin.
So here’s my rule: the data sheet for your exact product beats any blog post, including this one. Look for the CSP number printed on it, then pick the method that gets you there.
Related Article: Step-by-Step Basement Floor Coating Instruction Guide
Which Method Fits Your Floor’s Condition?
Your slab matters too. Some floors are easy. Others fight back.
| Floor condition | Better pick | Notes |
|---|---|---|
| Heavy oil stains | Shot blasting often wins | It fractures the surface deeply enough to remove deep staining. Still, degrease first. |
| Old coating or glue | Either works | Grinding handles coatings well. Shot blasting is fast, but its heat can make some old coverings sticky. |
| Weak, chalky top layer (laitance) | Either works | Both remove it. Shot blasting does it quickly. |
| Slick, smooth new slab | Grinding for most coatings | Gives an even, controlled profile |
| Metal bolts or studs in the floor | Be careful with grinding | Metal studs or bolts can damage a grinder |
| Low spots or pits | Neither one | Grinding shaves high spots but won’t fill low ones. Use a concrete repair product. |
One more tip. Don’t skip cleaning before shot blasting. Manufacturers say it’s essential to clean the concrete first. Otherwise you risk driving problems deeper into the slab.
What Can Homeowners Really Do Themselves?
Let’s be honest here. This is where the internet gets a little unrealistic.
Grinders Are Easier to Find
Most homeowners rent a walk-behind diamond grinder from a tool rental yard. They’re common, and they’re simple to run. Homeowners often report that a decent-sized garage takes most of a day. One homeowner said a 750 square foot garage took all day, and that some small imperfections still showed in the low areas.
What about a small angle grinder? Technically possible. But using one on a whole garage is like digging a ditch with a spoon. Homeowners estimate 10 to 14 hours with a small grinder, versus about 2 hours with a walk-behind. Those are rough, personal estimates, but they match my thinking. Use the small grinder for edges, not the whole floor.
Shot Blasters Are Harder to Find (and Easier to Mess Up)
Several homeowners say they struggled to find a shot blaster to rent at all. Others warn that beginners can leave “lawnmower lines,” which are streaky marks from sloppy passes.
Do I think a first-timer can do it? Maybe. But I wouldn’t want to learn on my own garage floor. For shot blasting, I’d hire a pro.
My Honest Advice
- DIY with a walk-behind grinder: Good for most home garages.
- Hire a pro for shot blasting: Smart for thick systems, oily floors, or big spaces.
- Not sure? Ask your coating’s maker what profile it needs. Then ask a local pro if they can hit it.
What Does It Cost?
I’ll be careful here, because prices change a lot by city and year. These numbers come from homeowner reports, so treat them as rough ballparks, not quotes.
| Item | Rough range reported by homeowners |
|---|---|
| Rent a grinder (hand or small) | Around $50 per day |
| Rent a walk-behind diamond grinder | Roughly $150 to $175 per day |
| Rent a shot blaster with vacuum | One homeowner reported about $350 per day |
| Diamond tooling | Extra. Some wheels run over $100 each. |
| Hiring a pro | Get local quotes. Old forum prices are likely out of date. |
Hidden costs people forget:
- Diamond tooling (usually not included in the rental)
- A strong dust vacuum
- A respirator and eye protection
- An edge grinder for corners
- Your time. A full day is common for a standard garage.
Call two or three rental yards and a couple of pros before you decide. Prices vary a lot.
Common Mistakes to Avoid
I’ve seen all of these. Let’s save you the trouble.
- Polishing the floor. Fine tooling makes the surface slick. Use the coarse tooling the coating needs.
- Going too rough on a thin coat. The texture shows through. It looks bad, and it’s tough to fix.
- Sloppy shot blast passes. Overlapping each pass by about 50% helps avoid streaks.
- Leaving dust behind. Dust under a coating ruins the bond. Vacuum like you mean it.
- Forgetting edges and corners. Machines can’t reach them. Plan on a hand grinder.
- Guessing the profile. Check the data sheet. Then check your floor.
Section summary:
- Thin coatings usually pair with grinding. Thick systems and moisture primers usually pair with shot blasting.
- Polyaspartic advice conflicts. Follow your product’s data sheet.
- Oil, old coatings, and weak concrete each change the best method.
- Homeowners can handle a walk-behind grinder. Shot blasting is better left to pros.
- Costs vary, so get local quotes.
Related Article: Why Is My Concrete Dusting? Causes, Tests, & Permanent Fixes
A Quick Decision Guide
Still stuck? Walk through these questions. Be honest with your answers.
| If this describes you… | Go with |
|---|---|
| Standard garage, thin epoxy or primer, doing it yourself | Diamond grinding (rent a walk-behind) |
| Decorative flake system or recoat over a sound old coating | Diamond grinding |
| Thick, high-build, or self-leveling system | Shot blasting (hire a pro) |
| Moisture-blocking primer on a damp slab | Shot blasting, if the data sheet asks for a deep profile |
| Heavy oil, thick old coating, or very weak concrete | Shot blasting, or a pro using both methods |
| Not sure what your product needs | Read the data sheet, then call the maker |
Remember, no method fixes a wet slab. Test for moisture first, using the plastic sheet test or a calcium chloride test. Prep makes the surface ready. It doesn’t stop vapor from pushing up from below.
Dust and Safety: Don’t Skip This Part
Here’s the part most blogs skip. Cutting concrete makes dust. Some of that dust contains respirable crystalline silica, a very fine dust that can harm your lungs over time.
It sounds scary, but it’s easy to manage:
- Use a vacuum made for dust. Hook it to the grinder if you can. A HEPA-style vacuum is the better choice.
- Wear a properly fitted respirator. A cheap paper mask isn’t enough. Check that the respirator is rated for fine dust.
- Protect your eyes and ears. These machines are loud.
- Ventilate the garage, and keep kids and pets out of the space.
- Don’t sweep dry. Vacuum instead, so dust doesn’t float back into the air.
For the full rules, check current silica safety guidance from OSHA (the US workplace safety agency). Professionals are legally required to follow it, and homeowners should treat it as good advice too.
Shot blasters help here too. Their built-in dust collection keeps the job cleaner. Another reason a pro may be worth it.
How to Check Your Profile Yourself
You’ve prepped the floor. Great. But how do you know it’s right?
Pros often compare the floor to a set of CSP reference chips. These are small pieces with known textures. You can also run a few simple checks yourself.
- The feel test. Run your hand across the floor. A grinder-prepped floor often feels like medium sandpaper. A shot-blasted floor feels rougher. Match it to what your data sheet says.
- The water drop test. Sprinkle a few drops of water on the floor. If it soaks in, the concrete is open. If it beads, something is still blocking it.
- The dust wipe test. After vacuuming, wipe a dark cloth across the floor. If it comes up white and dusty, vacuum again.
- The test patch. If you’re nervous, coat a small hidden corner first. Let it cure and see how it sticks.
Do the water drop test in several spots, especially where oil may have dripped.
Edges, Corners, and Cracks
Big machines are great in the middle of the floor. They aren’t great along walls.
Edges and Corners
Neither big grinders nor shot blasters reach right up to the wall. Use a hand grinder with a cup wheel for edges, door thresholds, and around posts. It’s slow work, but it matters. Peeling often starts at an edge.
Cracks and Holes
Cracks won’t fix themselves. Open them up a little with the grinder, vacuum them out, and fill them with a proper concrete repair product. Let it cure before coating. Otherwise, you may see the crack through your new floor.
Can You Use Both Methods?
Yes. In fact, many pros do.
A common plan is to use shot blasting first to open the concrete and remove heavy coatings or weak material. Then they use diamond grinding to refine the surface and clean up the edges. Some projects call for both, depending on the result they want.
You probably won’t need this for a basic garage. But it’s good to know it’s an option, especially if your floor has a thick old coating or heavy oil stains.
Section summary: Pick your method based on your coating and your floor. Wear a respirator and use a good vacuum. Check your profile with simple tests. Don’t forget the edges and cracks.
Frequently Asked Questions
Which is better for a garage floor, grinding or shot blasting?
For most home garages with standard coatings, grinding is the easier and more common choice. Shot blasting fits thick systems and heavily contaminated slabs.
What is CSP?
It stands for Concrete Surface Profile. It’s a 1-to-10 scale from the ICRI that describes how rough a prepped surface is.
Can I shot blast my garage myself?
It’s possible, but the machines are heavy and loud, and beginners can leave streaky marks. Many homeowners find grinders easier to handle, or hire a pro for this step.
Does diamond grinding remove old coatings?
Yes. Grinding can remove coatings, paint, and adhesives, though thick or stubborn layers take more passes.
Is shot blasting the same as sandblasting?
No. Shot blasting fires steel shot with a spinning wheel and recycles it. Sandblasting uses compressed air and other abrasives.
Can grinding make concrete too smooth?
Yes. Using the wrong fine tooling can polish the surface, and coatings grip polished concrete poorly.
Do I still need to test for moisture after prepping?
Yes. Prep roughens the surface, but it doesn’t stop moisture vapor. Test the slab before you coat.
Conclusion: Match the Method to the Job
So, diamond grinding vs shot blasting: neither one wins every time. Grinding gives a cleaner, more even profile for thin coatings. Shot blasting digs deeper for thick systems and rough jobs.
Here’s the short version. Read your product’s data sheet. Match the method to your coating and your floor. Protect your lungs. And always check the profile before you coat.
Which prep method did your last floor get? Share it in the comments, and bookmark this guide before your next coating job.
