
If you need heavy-duty protection for garages or workshops, epoxy is usually the better choice. If you want to protect outdoor concrete while maintaining its original look, a concrete sealer is typically the better option.
Concrete sealers protect concrete from moisture, stains, and weather while preserving its natural appearance. Epoxy creates a thick protective coating that offers superior durability, chemical resistance, and decorative finishes.
Choosing between a concrete sealer and epoxy coating isn’t as simple as selecting the strongest product. Both protect concrete, but they serve different purposes.
A penetrating sealer helps concrete resist water damage without changing its appearance, making it ideal for driveways, sidewalks, patios, and stamped concrete. Epoxy, on the other hand, forms a hard protective layer over the surface that resists chemicals, abrasion, and heavy traffic.
If you choose the wrong product, you could end up with peeling coatings, fading, expensive repairs, or a floor that doesn’t meet your needs.

Concrete Sealer vs Epoxy
| Feature | Concrete Sealer | Epoxy Coating |
|---|---|---|
| Protection | ★★★☆☆ | ★★★★★ |
| Durability | 2–5 years | 10–20 years |
| Chemical Resistance | Moderate | Excellent |
| UV Resistance | Excellent | Fair* |
| Appearance | Natural Look | Decorative |
| Slip Resistance | Good | With Additives |
| Installation | Easy DIY | Moderate/Hard |
| Best for Garages | Fair | Excellent |
| Cost (per sq. ft.) | $0.20 – $3.00 | $2.00 – $12.00 |
Concrete sealer vs epoxy comparison chart
1. What Actually Happens to Your Concrete?
To truly understand the choice between a concrete sealer and an epoxy coating, we must look past marketing terms and examine the substrate at a molecular level. Concrete appears solid, but it is actually a highly porous, crystalline matrix resembling a dense rigid sponge.
The Molecular Mechanics of Concrete Sealers
Concrete sealers generally fall into two primary scientific categories: penetrating (reactive) and topical (film-forming).
Penetrating Sealers (Silanes, Siloxanes, Siliconates, and Silicates)
These formulations do not deposit a visible film on top of the slab. Instead, they leverage the concrete’s inherent chemistry. When applied, these low-viscosity liquids wick deep into the capillary pores of the concrete via capillary action.
Once inside, they react chemically with the free lime (calcium hydroxide, a byproduct of cement hydration) to form calcium silicate hydrate (CSH) crystals or hydrophobic silicone polymers.
- Silanes: Possess the smallest molecular structure, allowing them to penetrate deep (up to 1/4 inch or more). They require a high pH to react and are exceptional for structural freeze-thaw protection.
- Siloxanes: Have a larger molecular structure and bond closer to the surface. They are frequently blended with silanes to provide both deep and surface-level hydrophobic protection.
- Siliconates: React almost instantly with the concrete surface to create a highly hydrophobic barrier. Perfect for exterior driveways and walkways, particularly on relatively fresh concrete.
- Silicates (Densifiers): Do not repel water directly. Instead, they fill voids to chemically harden and densify the concrete matrix, permanently eliminating “concrete dusting.”
Topical Sealers (Acrylics and Light Polyurethanes)
Acrylic sealers sit on top of the surface like a protective skin, typically forming a thin sacrificial layer (1 to 2 mils dry film thickness).). They use a physical bond rather than a deep chemical reaction to block water and UV rays.
The Polymer Chemistry of Epoxy Coatings
Epoxy is entirely different. It is not a single-component liquid that simply dries. It is a copolymeric system consisting of two distinct parts: a bisphenol-A/F epoxy resin and an amine-based hardener.
When these two components are mixed, they undergo an exothermic chemical reaction known as cross-linking. This creates a dense, highly cross-linked polymer network.
The Epoxy Science
Polymer Matrix
Why it matters: This reaction creates millions of microscopic “cross-links.” This is why your epoxy floor is tough enough to resist oils, chemicals, and impact—the molecular structure is literally too tight for liquids to penetrate!
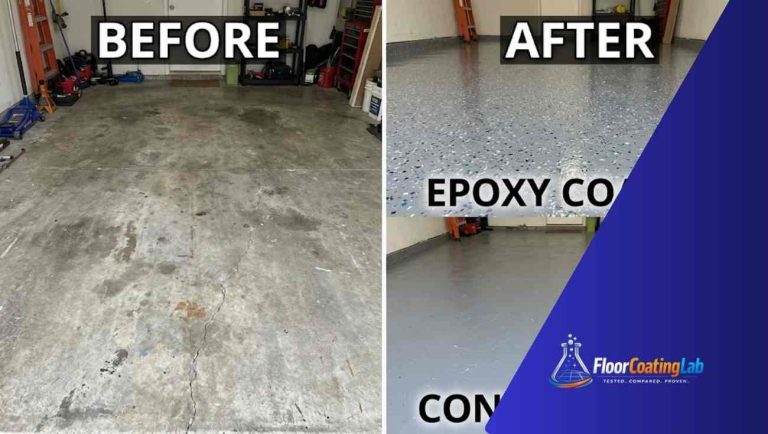
Instead of soaking into the pores to line them, epoxy establishes a massive structural mechanical bond to the top profile of the concrete. It fills minor surface pits and self-levels to form a continuous, impermeable, dense plastic monolithic barrier across the entire floor.
A standard multi-coat garage epoxy system can range anywhere from $10 \text{ to } 30+ \text{ mils}$ in total thickness—up to 15 times thicker than a topical acrylic sealer.
Related Article: Epoxy Floor Coating Surface Preparation
2. The Granular Lifespan & Wear-Cycle Matrix
The longevity of your floor isn’t just a random guess; it is governed by environmental variables, abrasion frequency, and the substrate’s mechanical profile.
Comparative Longevity Matrix
The table below outlines real-world expectations for various protection systems based on varying traffic conditions.
| Coating System Type | Chemical Architecture | Dry Film Thickness (Mils) | Residential Traffic Lifespan | Commercial Traffic Lifespan | Primary Failure Mode |
| Silane/Siloxane Blend | Penetrating / Reactive | 0 mils (Sub-surface)) | 7–10 Years | 3–5 Years | Friction wear of the upper concrete matrix |
| Water-Based Acrylic | Topical / Co-polymer | 1–2 mils | 1–3 Years | 6–12 Months | Scratches, UV delamination, traffic lane wear |
| Solvent-Based Acrylic | Topical / Solvent Solution | 1.5–2.5 mils | 2–4 Years | 1–2 Years | Yellowing, hot-tire pickup peeling |
| Moisture-Cured Polyurethane | Topical / Performance Film | 2–4 mils | 4–7 Years | 2–4 Years | Superficial scratching, gloss reduction |
| Water-Based Epoxy | Cross-linked Thin Film | 3–5 mils | 3–5 Years | 1–2 Years | Delamination from moisture or impact |
| 100% Solids Industrial Epoxy | High-Build Cross-linked Resin | 10–20 mils | 15–20 Years | 7–12 Years | Impact gouging, ambering from UV light |
| Flake Epoxy System (with Polyaspartic Topcoat) | Multi-layer Hybrid Matrix | 25–35 mils | 20–30 Years | 10–15 Years | Micro-scratching of topcoat after a decade |
3. Financial Analytics: Sealer Vs Epoxy

When budgeting for a flooring project, looking only at the initial cost per square foot is a critical financial mistake. You must calculate the Total Cost of Ownership (TCO) over a 20-year cycle to understand the true financial impact.
Scenario: A Standard 500-Square-Foot Two-Car Garage
Option A: High-End Solvent-Based Acrylic Sealer
- Initial DIY Material Cost: $200 (approx. $0.40/sq. ft.)
- Reapplication Cycle: Every 3 years.
- 20-Year Maintenance Schedule: 6 reapplications required.
- Total 20-Year Material Cost: $1,400 (7 total applications).
- Labor Investment: 7 full preparation and application cycles (approx. 70 hours of personal labor).
Option B: Professional 100% Solids Flake Epoxy System
- Initial Professional Cost: $3,250 (approx. $6.50/sq. ft. includes full prep & install)
- Reapplication Cycle: None. Engineered for long-term residential life.
- 20-Year Maintenance Schedule: Periodic sweeping/mopping only.
- Total 20-Year Cost: $3,250 (One-time investment).
- Labor Investment: Zero hours. Your only effort is enjoying your finished floor!
Comprehensive Cost Matrix
Total Cost of Ownership (TCO)
The Bottom Line: Most DIY concrete sealers have a low Initial Cost, but because you have to pay for Recoat Costs every few years, the TCO climbs rapidly. Professional epoxy systems have a higher Initial Cost, but since the Recoat Cost over 20 years is effectively zero, your long-term investment is often much lower.
| Performance Option | Material Cost Only (DIY) | Turnkey Professional Cost | Required Maintenance Windows | 20-Year Estimated TCO (Per Sq. Ft.) |
| Penetrating Sealer | $\$0.15 – \$0.45$ | $\$1.50 – \$2.50$ | Every 7–10 Years | $\$1.20$ (DIY) / $\$6.00$ (Pro) |
| Acrylic Topical Sealer | $\$0.30 – \$0.75$ | $\$2.00 – \$3.50$ | Every 2–3 Years | $\$3.50$ (DIY) / $\$18.00$ (Pro) |
| Water-Based Epoxy Kit | $\$1.20 – \$2.20$ | $\$3.50 – \$5.50$ | Every 4–5 Years | $\$6.00$ (DIY) / $\$22.00$ (Pro) |
| 100% Solids Industrial Epoxy | $\$2.50 – \$4.50$ | $\$6.00 – \$12.00$ | None (Every 15–20 Years) | $\$4.50$ (DIY) / $\$10.00$ (Pro) |
4. Performance Metrics Under Environmental and Chemical Stress
1. Chemical Resistance Performance (ASTM D1308 Testing Standards)
In workshop and garage environments, fluid spills are inevitable. How do these options stand up to common chemicals?
- Motor Oil & Transmission Fluid: Penetrating sealers reject oil temporarily, but it must be wiped up within hours to avoid dark staining. Epoxy resists motor oil indefinitely; it pools on the surface without penetrating the resin layer.
- Brake Fluid & Skydrol: Brake fluid behaves like a solvent on thin coatings. It will soften and blister acrylic sealers and low-grade water-based epoxies within minutes. Industrial-grade 100% solids epoxy remains completely unaffected.
- Battery Acid (Sulfuric Acid): Acrylic sealers fail instantly, leaving the concrete beneath open to acid etching. Epoxy coatings show high resistance, though prolonged exposure may cause minor cosmetic discoloration.
- Road Salt & Deicing Compounds ($CaCl_2$): Penetrating sealers excel here. By creating a deep hydrophobic field, they prevent saltwater from being drawn into the concrete pores, completely eliminating the internal pressure that causes surface scaling. Epoxy protects the concrete perfectly as well, but salt crystals left behind can make it slippery when wet.
2. Thermal Stress and UV Degradation (The Yellowing Problem)
- The UV Dilemma: Standard aromatic epoxy coatings contain molecular bonds that degrade under ultraviolet light. When exposed to direct sunlight, they undergo “ambering”—turning a clear or gray floor into a murky yellow. They will also chalk and lose their gloss over time.
- The Sealer Advantage: Penetrating silane/siloxanes are completely immune to UV degradation. Acrylic sealers formulated with pure acrylic resins offer excellent UV stability, meaning they will not yellow or peel when exposed to outdoor sunlight.
Pro Architectural Strategy: If you want the durability of an epoxy floor outdoors or in a garage with large windows, you must protect it with an aliphatic polyurethane or polyaspartic topcoat. These coatings act like a high-performance UV sunblock for your floor.
Related Article: Can You Use Epoxy Floor Paint on Wood?
5. Comprehensive Installation Manual & Mechanical Substrate Preparation
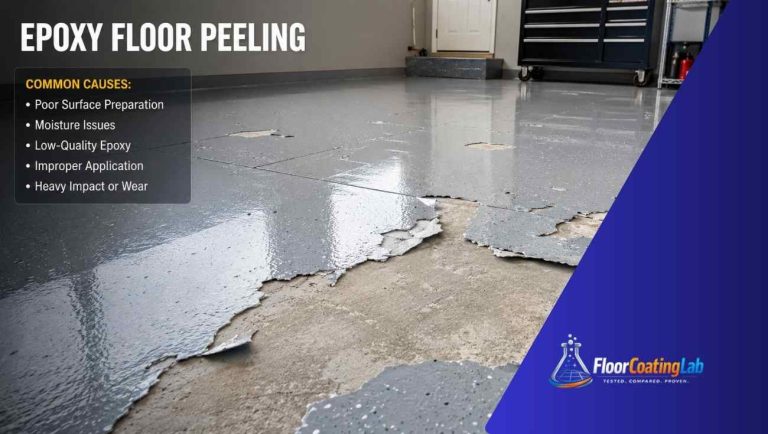
A floor coating is only as good as its surface preparation. Over 90% of all epoxy delamination and topical sealer failures are caused by improper preparation or high moisture levels within the slab.
EPOXIES: Mechanical Profiling
Concrete must feel like 60-grit sandpaper (CSP 2-3)
Epoxies rely on mechanical bonding. Without grinding or shotblasting to open those “teeth” in the concrete, the epoxy simply sits on the surface and will eventually peel off under pressure.
SEALERS: Capillary Openness
Surface must pass water drop test instantly
Penetrating sealers rely on capillary action. If the pores are clogged with dirt, oil, or old sealer, the liquid cannot soak in. It must absorb like a sponge to work!
The Concrete Surface Profile (CSP) Requirement
- For Concrete Sealers: Requires a CSP 1 (Smooth to acid-etched profile). The pores must be completely open and free of curing compounds, dirt, or oils.
- For Thin-Film Epoxies: Requires a CSP 2 (Grinding with 30/40 grit diamonds or uniform acid etching).
- For High-Build Industrial Epoxies: Requires a CSP 3 to CSP 4 (Heavy mechanical diamond grinding or shot-blasting). The concrete must feel like coarse 60-grit sandpaper to give the thick resin a strong mechanical grip.
Step-by-Step Installation Checklists
Method A: The Concrete Sealer Protocol
Slab Decontamination:
Scrub the floor using an industrial-grade oil degreaser or a sodium metasilicate solution. Thoroughly rinse away all residue.
Porosity Testing:
Pour water drops onto various areas of the floor. If the water does not soak in within 30 seconds, the concrete is too dense or may have an existing sealer that must be mechanically ground off.
Application Adjustments:
Use a low-pressure, high-volume (HVLP) pump sprayer equipped with an adjustable cone tip. Apply the sealer evenly while maintaining a wet edge to avoid visible overlap lines.
Micro-Film Management:
For topical acrylics, use a 3/8-inch nap lint-free roller to back-roll the wet sealer. This helps prevent heavy pooling, which can dry into cloudy or white spots.
Cure Phase:
Allow penetrating sealers to dry for 4 to 6 hours before permitting foot traffic. Wait a full 24 hours before driving vehicles onto the surface.
Method B: The Multi-Coat Epoxy System Protocol
Mechanical Diamond Grinding
Relative Humidity Testing
Structural Crack Patching
Induction Mixing
Squeegee & Roll
Mechanical Diamond Grinding:
Use a heavy walk-behind planetary diamond grinder equipped with 30-grit metal-bond diamonds to remove the weak top layer of concrete (laitance) and open up the pores beneath.
Moisture Assessment:
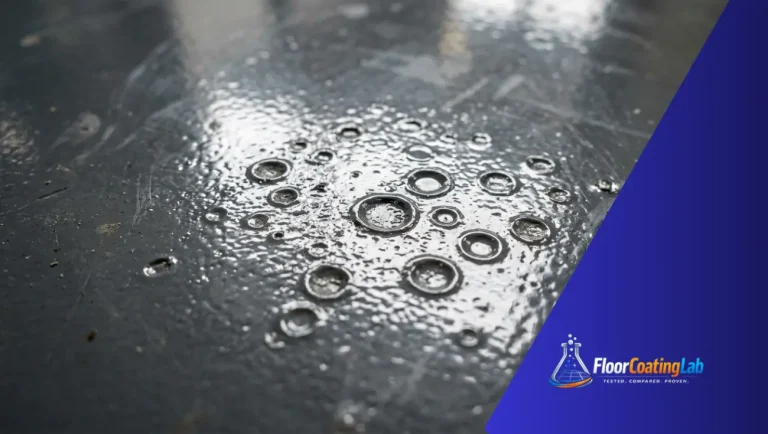
Conduct a quantitative calcium chloride test (ASTM F1869) or use an in-situ relative humidity probe (ASTM F2170). If moisture vapor emission exceeds 3 lbs per 1,000 sq. ft. per 24 hours, you must apply a specialized moisture vapor barrier primer first. Otherwise, hydrostatic pressure can cause blistering and peeling of the new floor.
Structural Crack Patching:
Vacuum all dust from cracks and joints. Fill them using a rigid, two-part structural epoxy crack filler, then grind the patches flush with the surrounding floor.
Induction Mixing:
Pour Part B (hardener) into Part A (resin). Mix thoroughly using a drill-mounted jiffy mixer paddle at low speed (around 300 RPM) for exactly 3 minutes. Scrape the sides and bottom of the bucket during mixing to ensure a complete blend. Allow the mixture to sit for the required induction time, if specified.
Application Mechanics:
Pour the mixed epoxy onto the floor in a continuous ribbon. Use a flat or notched squeegee to spread the material evenly, then back-roll with a 3/8-inch heavy-duty phenolic core roller for uniform coverage.
Broadcast Application (Optional):
If applying decorative color flakes, broadcast them upward so they fall evenly across the wet epoxy surface until full coverage is achieved.
Topcoat Application:
After allowing 10 to 24 hours for the base layer to cure, scrape off any loose flakes and apply a clear polyaspartic or polyurethane protective topcoat using a roller.
6. Lifespan Comparison
Concrete Sealer
Concrete sealers usually do not last as long as epoxy because they are thinner and wear away over time. Their lifespan also depends on whether they are used indoors or outdoors, and how much sun, water, or traffic the surface gets.
- Acrylic sealer: 1–3 years
Best for decorative concrete and light-use areas. Acrylic sealers are easy to apply, but they wear faster, especially on driveways or patios with heavy foot or vehicle traffic. - Penetrating sealer: 5–10 years
These sealers soak into the concrete instead of sitting on top of it. Because of that, they usually last longer and are a better choice for outdoor surfaces like driveways, sidewalks, and patios. - Polyurethane sealer: 5–7 years
This type offers stronger surface protection than acrylic and is more resistant to abrasion. It is often used where the concrete needs better durability, but it still does not last as long as a full epoxy coating.
Epoxy
Epoxy lasts much longer than most concrete sealers because it creates a thick, bonded layer on top of the concrete. It is especially effective in areas that need strong protection from impact, chemicals, stains, and daily wear.
- Residential garage: 10–20 years
A properly installed epoxy garage floor can last for many years if the surface is prepared correctly and the floor is maintained well. It is one of the most durable options for home garages. - Commercial: 5–15 years depending on traffic
In commercial spaces, epoxy lifespan depends on how much foot traffic, equipment movement, and chemical exposure the floor gets. Light commercial areas may last much longer, while heavy-use industrial spaces may need repairs or recoating sooner.
7. Architectural Decision
Specify a Penetrating Silane/Siloxane Sealer if: Your project involves outdoor surfaces exposed to the elements (such as driveways, sidewalks, or pool decks), where freeze-thaw protection is a priority, you want to maintain the concrete’s natural look, and you need a fast, budget-friendly application.
Specify a Multi-Coat 100% Solids Epoxy System if: Your project is an indoor space (like a garage, workshop, aircraft hangar, or commercial facility) that needs high durability, heavy impact resistance, complete protection from chemical spills, and an attractive, easy-to-clean decorative finish.
Frequently Asked Questions on Concrete Sealer vs Epoxy
Is epoxy better than concrete sealer?
For garages and workshops, yes. For outdoor concrete, usually no.
Can you apply epoxy over concrete sealer?
No. Existing sealers must usually be removed because it prevents proper adhesion.
Which lasts longer?
Epoxy generally lasts much longer than acrylic sealers. Penetrating sealers can also offer long service life but provide a different type of protection.
Which is cheaper?
Concrete sealers have a lower upfront cost.
Is epoxy waterproof?
Epoxy is highly water resistant but still requires proper surface preparation and installation.

8 Comments
Comments are closed.