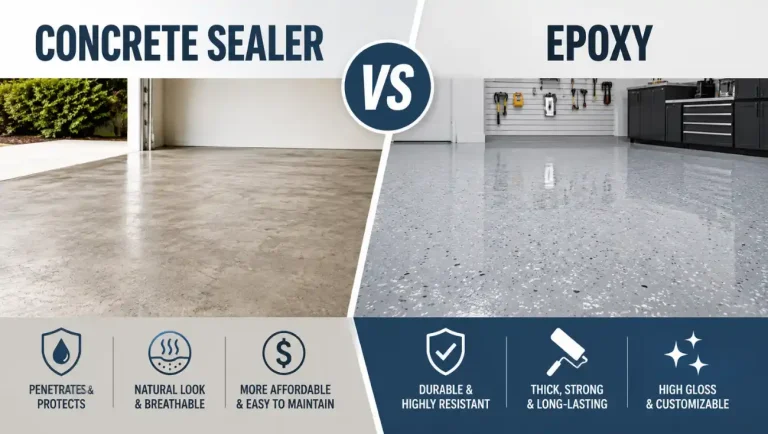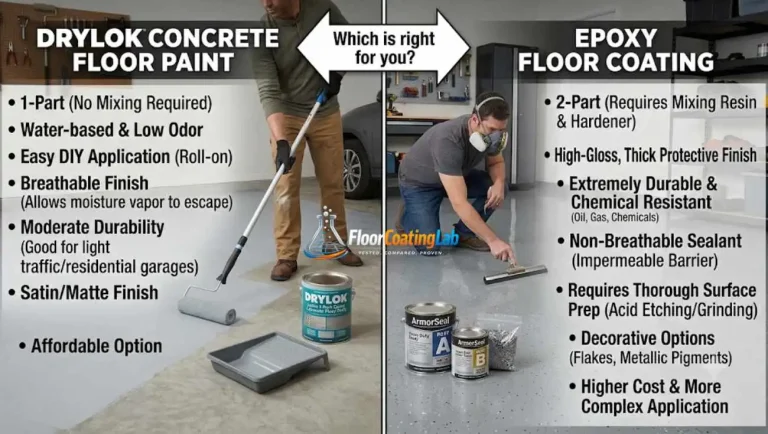
Stop epoxy floor peeling by grinding concrete to open pores, fixing moisture issues with a vapor barrier, and finishing with a durable polyaspartic topcoat.
Have you ever spent a whole weekend fixing up your garage, only to watch your hard work fall apart? It is the worst feeling. You buy a nice coating kit, roll it on, and it looks amazing. But a few months later, hot tire marks appear. Then, flakes start coming up. Suddenly, you are dealing with epoxy floor peeling.
Why does this happen? Well, it happens a lot more than you think. People spend billions on home upgrades every year, but a huge chunk of that goes to re-doing failed DIY projects. In fact, recent Statista data shows Americans spend over $400 billion on remodeling and repairs. I honestly think half of that money goes toward fixing bad garage floors!
Don’t worry, you are not alone. Whether you have a tiny peeled spot or huge sheets coming off, we can fix it. In this guide, we will figure out exactly why your floor failed. Then, we will show you how to fix it for good.
What Does Peeling Actually Mean?

We need to get a little science-y here. But I promise to keep it very simple! When your floor flakes off, it is not just “bad paint.” There is a real reason behind it. People always ask Google or Bing, “Why is my floor lifting?” The truth? It is usually about the bond between the paint and the ground.
To fix it, we first need to play detective. We have to look at the back of the peeled flake. Yes, seriously! Go out to your garage and grab a piece that chipped off your floor right now.
Look at the bottom of it. What do you see?
Adhesive vs. Cohesive Failure (The Detective Work)
This part is super important. There are two main reasons a coating lets go. Experts call them adhesive and cohesive failures. Let’s break down these fancy words so they make sense.
| Failure Type | What It Looks Like | What It Means |
| Adhesive Failure | The bottom of the flake is clean and smooth. | The epoxy never grabbed the concrete. Usually due to bad surface preparation or a dirty floor. |
| Cohesive Failure | The bottom of the flake has gray dust or tiny rocks stuck to it. | The epoxy grabbed perfectly! But the top layer of your concrete slab was too weak and broke off. |
If the bottom of your flake is totally clean, you have an adhesive failure. The coating just did not stick. This is my biggest pet peeve. It almost always means the floor was not clean enough or rough enough before painting. Using cheap DIY floor kits without grinding the floor first causes this all the time.
Here are the signs of a bad adhesive bond:
- The peeling starts exactly where your car tires sit.
- The concrete underneath feels perfectly smooth.
- You can peel up large sheets of the coating with just your fingers.
But what if there is gray dust on the back? That is a cohesive failure. The coating actually did its job! The bond was super strong. Sadly, the top layer of your concrete slab was just too weak. So, the epoxy grabbed the concrete, and when pressure was applied, it ripped the top layer of the floor right off!
Do you see why this matters? If you just slap more paint over a weak slab, it will just peel again! You have to fix the real problem first. We have to make sure the concrete is ready to hold a new coating.
5 Reasons Your Garage Coating is Lifting Off

Why do these floors fail? Most of the time, it is not the product’s fault. It is usually about what happened before the paint went on. Here are the five biggest culprits.
1. Poor Concrete Surface Preparation
This is the number one reason floors fail. I really hate when cheap kits tell you to just wash the floor and paint. That is terrible advice! Your floor needs a rough texture to hold the paint. Experts call this the concrete surface profile. If the floor is too smooth, the coating just slides off.
Many people try acid etching to fix this. But honestly? Acid etching rarely works well for older floors. The best way is diamond grinding. It opens up the concrete pores so the coating can soak deeply in and grab on tight.
2. Moisture Vapor Transmission (MVT)
Water is sneaky. Even if your garage looks dry, water might be hiding underneath. When ground water heats up, it turns into vapor. This vapor pushes up through the concrete. We call this upward push hydrostatic pressure.
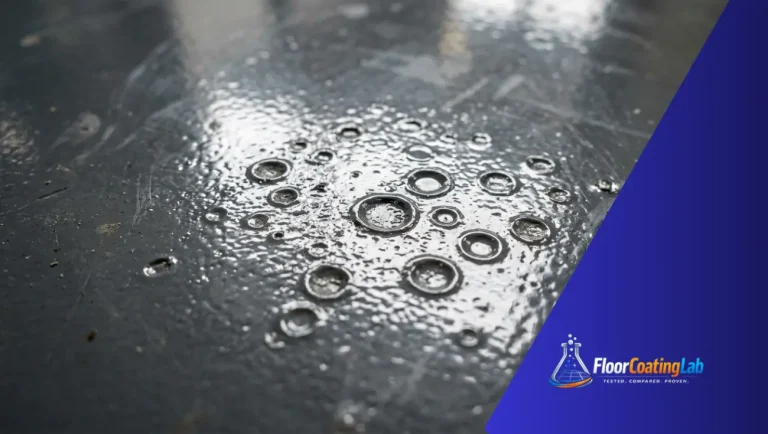
When the water vapor hits the bottom of your floor paint, it has nowhere to go. So, what happens? It creates huge bubbles and pops the coating right off! This sneaky water movement is known as moisture vapor transmission.
3. Hot Tire Pickup
Have you ever noticed your floor only peels where you park? That is classic hot tire pickup. When you drive on a hot day, your car tires get super hot. You park in the garage, and the hot rubber softens the cheap paint underneath. As the tires cool down overnight, the rubber shrinks and grabs the paint. When you back out the next morning… RIP! The paint rips right off the floor.
4. Hidden Substrate Contaminants
Concrete acts like a giant hard sponge. It absorbs everything. Oil drops, tire shine, bug spray, and old sealers get trapped deep inside. We call these substrate contaminants. If you just mop the floor, the oil stays trapped inside. When you roll the coating over it, it will never stick. Oil and water do not mix, and oil and floor coatings definitely do not mix!
5. Mixing and Curing Errors
Sometimes the mix is just wrong. Two-part kits have a base and a hardener. If you do not mix them exactly right, the floor will never dry properly. Also, the weather matters! If it is too humid or freezing cold, the epoxy curing process stops working. The coating stays sticky and eventually flakes away.
Related Article: Step-by-Step Basement Floor Coating Instruction Guide
How to Prevent Peeling Before You Coat
Want to know a secret? Professional installers spend 80% of their time prepping and only 20% painting. If you want a floor that lasts forever, you have to do some easy tests first.
Moisture Testing (The Plastic Sheet Trick)
You do not need fancy tools to test for water. You can do the plastic sheet test right at home. It is super easy!
- Step 1: Cut a 2-foot by 2-foot piece of clear plastic (like a trash bag).
- Step 2: Tape all four edges tightly to your bare garage floor using duct tape.
- Step 3: Leave it alone for 24 hours.
- Step 4: Look under the plastic the next day.
Is the concrete dark? Are there water drops on the plastic? If yes, you have a hidden moisture problem. You will need a special moisture-blocking primer before you coat.
The Water Drop Test
How do you know if your floor has a hidden sealer on it? Try the water drop test. Just pour a cup of water on the bare concrete.
Does the water soak in and turn the concrete dark right away? Great! Your floor is open and ready.
Does the water bead up like rain on a freshly waxed car? Uh oh. That means there is a sealer or oil blocking the pores. You must grind the floor to remove that barrier before doing anything else.
How to Fix Epoxy Floor Peeling for Good
Are you wondering how to fix epoxy floor peeling once the damage is done? Let’s roll up our sleeves. You cannot just ignore it. If you leave it alone, the edges will keep chipping away until the whole floor looks terrible.
Patching vs. Full Removal
First, we have to make a tough choice. Do you fix a small spot, or do you rip the whole thing up? Look at this chart to help you decide.
| Situation | What You Should Do | Why? |
| Only 1 or 2 small spots under the tires are peeling. | Patch the spots. | The rest of the floor bonded well. You just had a hot tire issue. |
| You see big bubbles everywhere. | Full Replacement. | You have a major moisture problem. A patch will not stop the water. |
| Huge sheets come up easily when you pull them. | Full Replacement. | The original prep work was bad. The whole floor is going to fail eventually. |
Step 1: Mechanical Removal
If you need to fix peeling epoxy garage floor areas, put away the sandpaper. It will not work. You need real power tools. You must scrape away all the loose flakes first. Use a heavy-duty floor scraper. Push hard and get everything that is loose.
Next, you need a concrete grinder. You can rent these at your local hardware store. Grind the bare concrete until it looks fresh and clean. If you are doing a full replacement, you must grind off all the old paint. Yes, it is dusty and hard work. But it is the only way to get a permanent bond.
Step 2: Moisture Barriers
Remember that plastic sheet test we did? If you saw water, you must put down a moisture vapor barrier next. This is a special thick primer. It blocks the water from pushing up into your topcoat. Think of it like a raincoat for your concrete. You roll it on, let it dry, and your water problems are solved.
Step 3: Upgrading the Topcoat
This is my favorite part. If you had an epoxy garage floor peeling because of hot tires, do not use the same cheap paint again! You need to upgrade.
Have you heard of polyaspartic vs epoxy? I love polyaspartic coatings. They are super strong. They do not turn yellow in the sun. Best of all, they handle hot tires way better than standard DIY kits. Apply a good polyaspartic clear coat over your color flakes. Your floor will look like a showroom, and it will actually stay that way!
Frequently Asked Questions (FAQ)
Can I just paint over peeling epoxy?
No, please don’t! If you paint over loose epoxy, the new paint will just peel right off with the old stuff. You must remove anything that is loose and grind the bare concrete first.
Why is my epoxy floor peeling off in big sheets?
If your epoxy floor peeling off looks like big plastic sheets, it means the floor was not prepped right. The concrete was probably too smooth or dirty, so the coating never grabbed the pores.
Will hot tires ruin a professionally installed floor?
Usually, no. Professionals use commercial-grade products and polyaspartic topcoats. These materials are built to handle the intense heat of rubber tires without melting or lifting.
Do I need to remove all old epoxy before recoating?
If the old epoxy is stuck down incredibly tight and you just want to change the color, you can sometimes just scuff it up and coat over it. But if it is peeling in multiple places, yes, you should grind it all off and start fresh.
How do I test my concrete before coating?
Always do the water drop test to check for hidden sealers. Then, do the plastic sheet test to check for moisture. These two easy tests save you from massive headaches later!
Conclusion
So, what is the big takeaway here? Why does all this matter?
Because your home is your biggest investment! A peeling, ugly garage floor brings down the look of your whole house. It is frustrating to spend money on a project just to watch it fail. But now you know the secret. The magic is not in the paint; the magic is in the preparation. If you take the time to test for moisture, grind the concrete, and choose a high-quality topcoat, your floor will be bulletproof.
Are you ready to tackle your garage floor the right way? Head over to floorcoatinglab.com to explore our premium coating kits, grab the right tools for the job, and learn more pro tips.
What is the worst flooring disaster you have ever dealt with? Let me know, and let’s fix it together!