
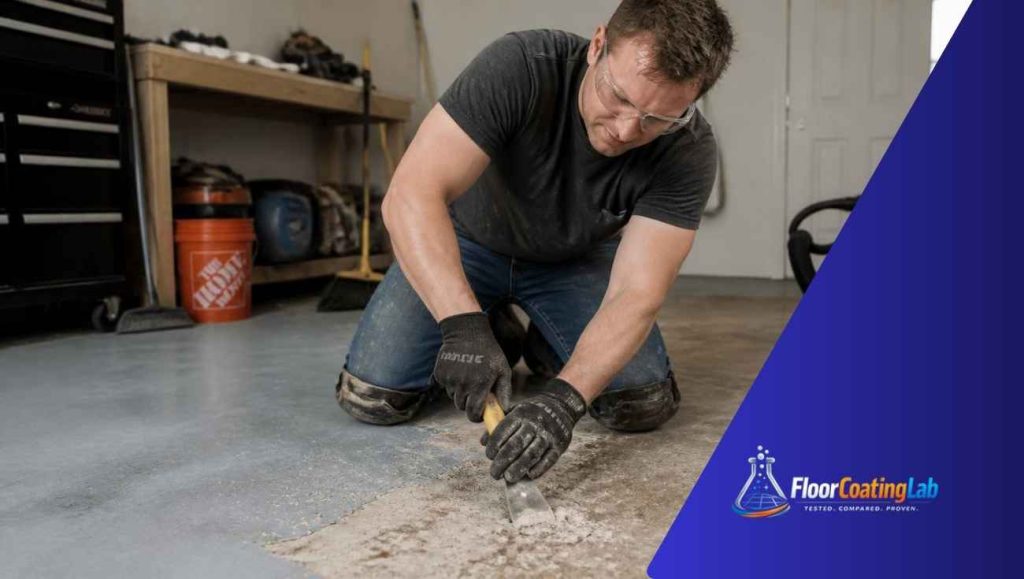
To remove polyurethane from concrete, use a chemical solvent stripper covered with plastic tarping to soften it, or grind it off using PCD diamond tooling.
Have you ever looked down at your garage or patio floor and felt like sighing? I know that feeling all too well. You notice peeling yellow spots, ugly flaking pieces, or sticky patches on your floor. Old, worn-out floor coatings can turn a nice space into an eyesore!
Removing tough clear coats can feel like a total nightmare. If you want to know how to remove polyurethane from concrete without losing your sanity, you are in the right spot!
Why is polyurethane so stubborn? Well, acrylic paints just sit loosely on top of the slab. Polyurethane is much tougher. It forms a tight chemical bond and sinks deep down into your floor. You cannot just splash some hot water on it and scrub it away.
So, what should you do? Should you pour a strong solvent stripper all over the place? Or should you rent a heavy machine for diamond grinding?
In my opinion, there is no single “magic bullet” for every project. The best choice depends on where your floor is, how thick the clear coat is, and how much mess you want to clean up. In this guide, I will walk you through everything step by step. We will compare your best choices so you can fix your floor like a pro!

Polyurethane Coatings on Concrete Substrates
Before you go buy tools, let us look at what is sitting on your floor. Knowing your coating helps you pick the right fix.
1K Moisture-Cure vs. 2K Aliphatic Polyurethane Topcoats
Not all polyurethane coatings are built the same way.
- 1K Moisture-Cure Polyurethane: This is a single-component polyurethane sealer you can buy at most hardware stores. It uses air humidity to harden. It is thinner and easier to break down with a bio-based stripper.
- 2K Aliphatic Polyurethane: This product uses two liquid parts mixed right before painting. It creates a super-hard chemical seal. It resists car tires, gas spills, and sun rays. It is awesome for garage floors, but it is much harder to strip off!
Why Polyurethane Penetrates Concrete Pores Differently Than Epoxy
Think of raw concrete like a giant hard sponge. It is full of tiny microscopic concrete pores.
When workers pour liquid epoxy on a slab, it acts like thick maple syrup. It stays mostly near the top surface. But liquid polyurethane is thin like water when applied. It gets sucked deep into those tiny holes.
Because it hooks deep inside the stone, scraping the top surface with a hand blade leaves lots of gunk behind. That is why a simple scraper usually is not enough.
Method Selection: Chemical Stripping vs. Mechanical Grinding
Are you stuck deciding between liquids or machines? Let us look at both options side by side.
CHEMICAL STRIPPING
Low Dust
Small Spaces
MECHANICAL GRINDING
Large Slabs
Re-Coating Prep
When to Choose Chemical Solvents (Indoor, Low Dust, Decorative Concrete)
Chemicals are great when you cannot make a huge mess.
If you are working in a basement or a small laundry room, you probably do not want dusty air flying everywhere. A liquid or gel chemical stripper softens the top coat so you can scoop it up as a wet paste. It is also gentle on stamped or colored concrete patterns.
When to Choose Diamond Grinding (Large Garages, Heavy Build, Re-coating Prep)
Do you have a big two-car garage or a super thick topcoat? Then mechanical power is your best friend!
A floor grinder uses spinning diamond discs to shave off the top layer of coating. It takes some muscle, but it works fast on big areas. It also scratches up the bare stone to create a fresh concrete surface profile. That rough texture helps your new coat stick perfectly later.
Method Comparison Matrix
Here is a quick breakdown to help you compare both ways:
| Feature | Chemical Stripping | Diamond Grinding |
| Best Used For | Indoor rooms, small patios, stamped stone | Large garages, thick coatings, whole basements |
| Dust Level | Almost zero dust | Very high dust (Requires HEPA vacuum) |
| Noise Level | Quiet | Very loud |
| Skill Needed | Beginner friendly | Medium (Requires machine control) |
| Substrate Impact | Keeps original concrete shape smooth | Roughens concrete surface for new paint |
| Average Speed | Slower (Requires wait times) | Faster on open, flat floors |
Step-by-Step Guide: Removing Polyurethane with Chemical Solvents
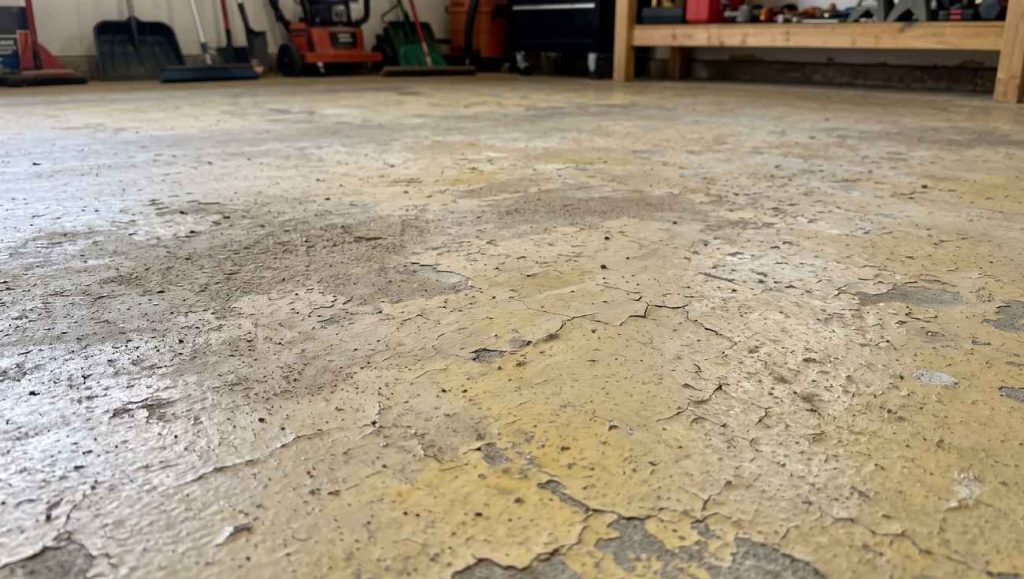
If you decide to use chemical liquids, follow these exact steps to get the job done safely.
Safety Warning: Always protect your lungs! The Occupational Safety and Health Administration (OSHA) sets strict limits on indoor air contaminants to keep workers safe. Never skimp on protective gear when working with strong fumes or dust!
Required Tools & Safety PPE
Gather these supplies before starting:
- Respirator mask with organic vapor cartridges (Do not rely on a cheap paper dust mask!)
- Chemical-resistant rubber gloves and safety goggles
- Your choice of chemical stripper
- A stiff-bristle nylon brush
- A wide metal floor scraper or putty knife
- Plastic tarps or drop cloths
- Bucket and pH test strip papers
Solvents Breakdown: Acetone, Xylene, Soy Gel, and Bio-based Solvents
Which liquid should you pick up at the store?
- Acetone: Very fast-drying liquid. It works on thin sealers, but it evaporates quickly.
- Xylene: Stronger liquid solvent. It breaks down clear coats well, but it gives off strong chemical smells.
- Soy Gel / Bio-based Stripper: Made from natural plant oils. It smells mild and stays wet for hours. Honestly, this is my personal favorite for home projects because you will not choke on harsh fumes!
Step 1: Surface Preparation & Masking Walls/Trim
First, sweep away all dirt, leaves, and loose sand.
Next, tape plastic tarps along the bottom of your drywall, trim boards, or garage walls. Chemical strippers will ruin painted wood and drywall if they splash!
Step 2: Applying Chemical Stripper & Tarping for Evaporation Control
Pour your gel or liquid stripper generously over the floor. Use a roller or brush to spread a thick, even coat. Do not brush it out thin like paint! You want a thick layer sitting on top.
Here is a great pro trick: cover the wet stripper with thin plastic sheets. Tarping traps the liquid so it stays wet and keeps working deep down into the clear coat instead of drying out in the air.
Step 3: Scraping Softened Slurry & Pore Scrubbing
Let the chemical sit for 30 to 60 minutes. You will see the clear coat bubble up and turn into a soft, wrinkled gel.
Take your long floor scraper and push the soft sludge into piles. Scoop the wet gunk into an empty bucket.
Then, pour a little extra stripper on stubborn spots and scrub hard with a stiff brush to clean out the deep pores.
STEP 1: PREP & MASK
- Sweep away dirt
- Tape plastic on walls
- Put on safety equipment
STEP 2: APPLY & TARP
- Spread thick stripper
- Cover with plastic sheet
- Let liquid sit and soak
STEP 3: SCRAPE & WASH
- Wait 30–60 minutes
- Scrape soft sludge
- Scrub pores & check pH
Step 4: Neutralizing Wash & pH Testing the Slab
Do not skip this step! Chemical strippers leave invisible chemical film behind. If you leave that residue on your floor, your next paint coat will fail.
Mix clean water with a mild neutralizing soap or degrease cleaner. Scrub the floor thoroughly and rinse with clean water.
Once dry, wet a small spot with distilled water and press a pH test strip against the wet stone. You want a neutral pH score between 6.0 and 8.0. If the number is too high, rinse the slab one more time.
Section 1 Summary & Key Takeaways
Key Takeaway Box
- Know Your Finish: Tough 2K coatings usually need strong solvents or mechanical tools, while thin 1K sealers strip off easily.
- Chemicals = Low Dust: Choose liquid strippers for indoors or decorative stamped stone where you cannot make dust.
- Cover Your Stripper: Always lay plastic sheets over wet stripper to stop rapid evaporation.
- Never Skip the Neutralizing Rinse: Always wash off chemical residues and check your floor with a pH test strip before applying new paint.
Related Article: How to Strip Concrete Sealer: The Complete DIY Guide
Step-by-Step Guide: Mechanical Polyurethane Removal via Diamond Grinding

Sometimes chemical liquids just won’t cut it. Maybe you are tackling a giant garage floor, or perhaps you are dealing with a thick industrial coating that refuses to budge.
When you want to remove polyurethane from concrete quickly over a wide area, mechanical grinding is your best option! Grinding strips away old coatings while opening up fresh stone underneath.
Equipment Selection: Walk-Behind Floor Grinders vs. Angle Grinders
Picking the right machine saves your back and your time!
- Walk-Behind Floor Grinders: These heavy-duty machines are perfect for large areas like garages or basements. Planetary grinders feature three spinning heads that deliver a smooth, even finish.
- Handheld Angle Grinders: Great for edges, corners, and tight spots around posts. Be sure to mount a dust shroud around the wheel!
Choosing the Right Diamond Segments (PCD Scrapers vs. 16/30 Grit Metals)
Not all diamond attachments perform the same task.
- PCD (Polycrystalline Diamond) Scrapers: These segments feature sharp synthetic diamond blades. Instead of sanding, PCD tools physically slice through thick coatings like butter. Use them first when dealing with heavy builds.
- 16/30 Grit Metal-Bond Diamonds: These segments contain diamond particles embedded in metal blocks. They grind away thin sealers and smooth out the bare slab surface.
Dust Containment & HEPA Vacuum Attachment Standards (OSHA Silica Compliance)
Health Notice: Concrete dust contains crystalline silica. Inhaling silica dust can cause serious lung conditions.
Always connect your grinder directly to an OSHA-approved HEPA dust extractor. Standard household shop vacuums cannot filter micro-dust particles and will blow hazardous dust straight back into your room!
Step 1: Initial Pass with PCD Tooling to Break High-Build Coatings
Attach your PCD scraper segments to the grinder base. Start the machine, move slowly in overlapping passes, and keep the machine swinging gently from side to side.
The PCD blades will scrape off the top clear coat in small chips without melting the plastic onto your tooling.
STEP 1: PCD PASS
- Use PCD scraper segments
- Slice off thick coating
- Avoid melting plastic
STEP 2: METAL BOND PASS
- Switch to 16/30 metal grit
- Smooth out bare concrete
- Open concrete pores (CSP)
STEP 3: VACUUM CLEANUP
- Run HEPA vacuum over floor
- Inspect for leftover spots
- Prepare for final coating
Step 2: Secondary Pass with Metal-Bond Diamonds to Profile Concrete (CSP 2-3)
After removing the top coating layer, swap out the PCD scrapers for 16/30 grit metal-bond diamonds.
Make a second pass across the floor. This step removes remaining scratches and opens up the microscopic pores, leaving a textured surface that resembles medium-grit sandpaper—ideal for bonding your new floor finish!
Alternative Removal Methods: Heat Guns & Infrared Stripping
What if you only have a few small stubborn patches along the wall? You might not need to rent a giant machine.
Thermal Softening for Spot Removal & Edges
A high-temperature heat gun can help soften stubborn spots. Direct hot air onto a small 6-inch section until the clear coat blisters, then immediately scrape it away using a firm hand scraper.
Toxic Fume Risks & Temperature Threshold Warnings
Be cautious when applying heat! Overheating polyurethane can scorch the resin and release dangerous fumes.
- Always keep your heat gun moving—never hold it over one spot for more than 5 seconds.
- Work outdoors or keep windows wide open with box fans blowing air outside.
- Wear a respirator mask rated for organic vapors and thermal gases.
Dealing with Spills, Yellowed Residue, and Deeply Penetrated Pores
Even after stripping the surface, you might notice dark or yellowed spots remaining in the stone. That happens because liquid sealers soak deep into bare concrete.
POULTICE PASTE METHOD
SOLVENT WASH METHOD
Extracting Polyurethane Stains from Unsealed Concrete Pores
When clear coats yellow from sun exposure, the discoloration often penetrates below the surface.
To lift these deep stains, pour a small amount of xylene solvent over the spot, let it soak for two minutes to soften the buried resin, and scrub vigorously with a wire brush.
Poultice Cleaning Technique for Oil & Urethane Residue
For stubborn deep stains, create a poultice paste:
- Mix absorbent powder (like diatomaceous earth or powdered chalk) with acetone until it forms a thick paste like peanut butter.
- Slather a 1/4-inch layer over the stain.
- Cover the paste with plastic wrap and tape down the edges.
- Let it dry completely for 24 hours. As the solvent dries, it draws buried oils and resins out of the stone into the powder!
- Sweep up the dried powder and discard it safely.
Section 2 Summary & Key Takeaways
Key Takeaway Box
- PCD Tools for Heavy Coatings: Use PCD scrapers to remove thick clear coats without melting them.
- 16/30 Metal Grit for Finish: Follow up with metal-bond diamonds to create a proper profile on your slab.
- Use a HEPA Vacuum: Always pair mechanical grinders with a HEPA vacuum to trap dangerous silica dust.
- Poultice Lifts Deep Stains: Use a solvent-based poultice paste to draw deep stains out of porous concrete.
5 Critical Mistakes to Avoid When Removing Polyurethane
Even smart DIY fans make small slips that ruin their floors. Let us look at five common mistakes so you do not fall into these traps!
1. Rushing Chemical Dwell Time or Allowing Solvents to Dry Prematurely
Chemical strippers take time to work. If you scrape too fast, you waste money and time. On the flip side, if you leave solvent open to hot air, it dries up into a sticky mess.
Always cover wet strippers with plastic sheets to lock in moisture!
2. Using the Wrong Diamond Bond Hardness (Gouging Concrete Substrate)
Did you know soft concrete needs hard-bond diamonds, and hard concrete needs soft-bond diamonds?
If you pair soft concrete with soft-bond diamonds, the machine cuts too fast. You will leave deep swirl marks and gouge your slab!
3. Skipping Concrete Neutralization Before Applying New Coating
Rinsing with plain water is not always enough. If chemical stripper film stays on your slab, it will destroy your new epoxy or paint layer. Always use a neutralizing wash and check your floor with a pH test strip.
4. Inadequate Ventilation and Vapor Safety
Solvent fumes like xylene and acetone weigh more than air. They float down low to the floor in basements and garages.
Always open doors, set up box fans blowing outward, and wear a fitted respirator mask.
5. Ignoring Moisture Vapor Emission Rates (MVER) After Wet Stripping
When you wash down a slab with gallons of water, the stone soaks it all up. If you roll new paint over a wet slab, trapping that moisture causes bubbles and peeling. Let your floor dry out completely before re-coating!
Preparing the Bare Concrete Surface for New Coatings or Sealers
Now that your floor is totally clean, how do you prep it for a fresh coat?
CHECK MOISTURE CONTENT
- Perform plastic sheet test
- Ensure slab is completely dry
INSPECT PROFILE (CSP)
- Aim for CSP 2 to 3
- Texture should feel like sandpaper
ACID ETCH / SPOT GRIND
- Clean remaining slick spots
- Vacuum all remaining dust
Checking Moisture Content & Concrete Surface Profile (CSP)
First, make sure your concrete is dry. Tape a 2×2 foot sheet of clear plastic down on the floor. Wait 24 hours. If you see water drops under the plastic, your slab is still too wet to coat!
Next, check the texture. For new epoxy or polyurethane, you want a concrete surface profile of CSP 2 or CSP 3. The floor should feel slightly rough like 80-grit sandpaper.
Acid Etching vs. Mechanical Shot Blasting Post-Removal
If chemical stripping left your floor smooth, you must open the pores before painting:
- Acid Etching: Muriatic acid washes etch smooth stone. Just remember to neutralize and rinse thoroughly afterwards!
- Shot Blasting / Light Grinding: A fast mechanical pass cleans off residual debris without using water.
Frequently Asked Questions (FAQs)
Will acetone remove dried polyurethane from concrete garage floors?
Acetone can soften thin clear coats or fresh spills. However, thick or old 2K polyurethane coatings usually require stronger solvents like xylene, soy-based strippers, or mechanical diamond grinding.
Can I paint or apply epoxy over old polyurethane without removing it?
No, applying paint or epoxy directly over un-sanded polyurethane is risky. Old polyurethane is glossy and slick, so new coatings cannot grip it well and will peel away quickly.
What chemical stripper is safest for indoor polyurethane removal?
Bio-based or soy-based strippers are the safest choices for indoor projects. They emit low VOC fumes, have mild odors, and remain wet longer than harsh solvents.
How long does chemical stripper take to soften polyurethane on concrete?
Most strippers take between 30 and 60 minutes to react. Covering the wet stripper with thin plastic tarping prevents rapid drying and gives the chemical more time to break down tough coatings.
Does pressure washing remove polyurethane sealer from outdoor concrete?
Pressure washing alone rarely removes bonded polyurethane. Water pressure can break off flaking pieces, but you still need a chemical stripper or floor grinder to clear the rest.
Conclusion & Recommended Next Steps
Stripping clear coats off concrete might seem overwhelming, but breaking the job into simple steps makes it manageable!
If you are working indoors on a small stamped floor, a bio-based chemical stripper with a plastic cover is your easiest route. For big garage floors with thick layers, renting a walk-behind grinder with PCD scrapers gets the job done fast.
Always remember: protect your lungs with a good respirator mask, check your floor’s pH level, and make sure your slab is completely dry before applying new paint. Take your time, follow these steps, and you will turn that old eyesore into a smooth, beautiful floor!
2 comments
Comments are closed.